Envato Tuts+ Tutorials |
- How to Use a Mini Shoulder Brace or Half-Rig to Create Stable Handheld Video
- 9 Black and White Photo Conversion Techniques for Photoshop (How To)
- 43 Best T-Shirt Back Mockups (Using a T-Shirt Mockup Generator)
- 19 Best Free Science & Technology Google Slides Themes (Presentations 2021)
- 30+ Aesthetically Pleasing PowerPoint Templates (Free + Premium PPT Designs 2021)
- 15 Best Web Fonts That Look Great at Small Sizes
- How to Make Dripping Text in Photoshop
- Build a WordPress LMS Website With the Masterstudy Theme
- 44 Best Plus Size T-Shirt Mockups (Using a T-Shirt Mockup Generator)
- Creative Arabic Calligraphy: Anatomy of the Letterforms
- How to Use LUTs to Colour Grade Pictures in Affinity Photo
- How to Make Your Own Google Slides Presentation Template in 2020
| How to Use a Mini Shoulder Brace or Half-Rig to Create Stable Handheld Video Posted: 18 Jun 2021 07:06 PM PDT Mini rig, micro rig, shoulder brace: there are a few names for this simple contraption. Essentially a rod and shoulder pad, the adjustable shoulder brace is one of the easiest ways to take handheld video easier and more comfortable without adding a lot of bulk or expense. With a small, lightweight brace, you can set up to shoot faster and go to places where bulky equipment like tripods, large shoulder rigs, and finicky stabilizers can't go. In this lesson from the course Video Production on the Go, with Slavik Boyechko, you'll learn how to use a simple and inexpensive shoulder rig to make smooth shots. Keep Studying Video ProductionCourses like this, along with stock images, templates, graphics and more are available at Envato Elements, an all-you-can-download library with a monthly subscription.  |
| 9 Black and White Photo Conversion Techniques for Photoshop (How To) Posted: 18 Jun 2021 05:07 PM PDT Black and white photography is as popular as ever, and, with digital software like Adobe Photoshop, it's never been easier to convert your digital images. In this article we'll run through some of the most popular black and white conversion methods, outlining the pros and cons of each. Instructions are provided for Photoshop CS and, if the technique's available, Photoshop Elements. The techniques we cover:
In case you don't want to read through every technique, we recommend the last two techniques for most people: using the Camera Raw filter and LUTs. Black and White ActionsIf you're looking for some great Photoshop Actions to do the work for you, then there's plenty of choice over at Envato Elements where you can download unlimited resources for a monthly subscription. You could start with this set of 31 Professional Black & White Photoshop Actions which gives you a wide range of options for creating different black and white effects depending on the look you're going for.    How to Convert a Color Photo to Black and White in PhotoshopConverting to black and white digitally has a number of advantages. By starting with a colour photo and converting it to black and white in Photoshop, you have complete control over the conversion. For the best possible conversion, start by shooting in RAW. Then, in your RAW conversion software, output the photo as a 16-bit Tiff file. 16-bit files have a lot more information to work with than 8-bit files, which makes for a better conversion with smoother tonal graduations. Most digital SLRs (and some compacts) have a black and white mode. The camera is making the conversion for you, and the results are usually poor, giving flat, washed out photos. It's usually best to avoid this mode, and use the following techniques instead. Black and White ConversionsPhotoshop and Photoshop Elements offer both destructive and non-destructive black and white conversion techniques. Destructive methods are ones that can't be re-adjusted afterwards. Once you've made the conversion, the only way to change it is to undo the conversion and start again. Non-destructive methods use Photoshop's adjustment layers. The changes that you make to your photo are stored in a layer, and the original photo remains unchanged underneath. Then, when you're done, you flatten the image and it's as this stage that Photoshop makes all the changes to the photo permanent. You can edit the conversion at any time before flattening the image by clicking on the Adjustment Layer icon. Non-destructive photo editing is always better than destructive photo editing!    1. Convert to Greyscale (Destructive)The simplest black and white conversion method, converting to grayscale discards all the colour information in the photo.
The method is the same for both Photoshop and Elements.
2. Use the Hue/Saturation Tool (Non-destructive)This method gives exactly the same result as converting to greyscale and adding a black and white adjustment layer. The advantage is that it's available as an adjustment layer, and can be used as part of a non-destructive editing process. Photoshop CS and Photoshop Elements:
   3. Lab Color Method (Destructive)This technique converts your photo from RGB colour mode mode to Lab colour mode. Lab mode records the brightness and colour values separately, meaning in Lab you can discard the colour information to leave a black and white image. It's not available in Photoshop Elements.
4. Gradient Map (Non-destructive)The Gradient Map tool maps a black and white gradient to the brightness values of your photo. Dark areas become black or dark grey and highlights white or light grey.
  
5. Channel Mixer (Non-destructive)The Channel Mixer is the first black and white conversion tool listed here that truly begins to use the full potential of the information contained in the colour photo. Colour photos have three colour channels; red, green and blue. These primary colours combine to make the millions of colours in your photo. The Channel Mixer conversion method lets you adjust the ratios between the red, geen and blue channels. Lightening the value of a channel with the channel mixer lightens colours close to it on the colour wheel and darkens the colours that are opposite it. Increase the value of the red channel, for instance, and you'll make the red tones in your photo lighter and the blue ones darker. This has the effect of lightening skin tones and darkening blue skies. Channel Mixer is the digital equivalent of black and white photographers using colour filters. Setting the brightness of the red channel to 100% gives the same effect as using a red filter on the lens with black and white film. It's not available in Photoshop Elements. Photoshop CS:
  
6. Twin Hue/Saturation Method (Non-destructive)This technique uses two Hue/Saturation Adjustment Layers. The top layer is a straight monochrome conversion. The bottom layer changes the colours of the original photo, which in turn changes the tones in the black and white conversion. It gives you a fine degree of control. Photoshop CS and Photoshop Elements:
  
7. Black and White Adjustment Layer Method (Non-destructive)Available in Photoshop CS3 onward, the Black and White Adjustment Layer gives you all the control of the channel mixer and twin hue/saturation techniques via six colour sliders. But the most exciting feature is its Targeted Adjustment Tool. With this tool you can adjust tones in your photo to make them lighter or darker. It's an intuitive and a precise conversion technique.
  
Learn more about Photoshop and Photoshop Elements. 8. Use a Camera Raw Adjustment Layer (Non-destructive)Adobe Camera Raw has several ways to convert to black and white, and you might already be comfortable with them. Why not use the same tools in Photoshop, too? Here's how:
9. Apply A Look-Up Table (Non-destructive)Here's a twist on the Camera Raw method that uses presets, or Look-Up Tables, to make the process quick and instantly repeatable.
5 Cool Black and White LUTs From Envato ElementsThe above techniques work well to convert your photos to black and white. If you want a quicker way to get these results, then check out these black and white LUTs from Envato Elements: 1. 50 Nostalgia Black and White LUTs PackIf you like a classic look, try out this bundle. It features 50 unique black and white LUTs with a nostalgic style. This cinematic LUT pack can help you transform your photos in a matter of clicks.    2. 50 Black and White Wedding LUTs PackAre you editing photos from your big day? Then try out this black and white LUT download. It was created with weddings in mind. Use it to add a touch of elegance to shots of the happy couple.    3. 50 Black and White Mystery LUTs PackFor a bit of mystery, try out this cool black and white LUTs pack. The effect is easy to apply and works for both Mac and Windows devices.    4. 20 Black&White LUTs (Look Up Tables)This bundle of 20 LUTs takes a unique approach to color correction. It applies the black and white effect, but also comes with options that allow a little color to seep through. Try it out to see what you can create.    5. 10 Black and White Lightroom PresetsWe round out our list with these ten Lightroom presets. The results of the color correction make your photos look like they were shot in black and white originally.    Speaking of presets, you can find 40 awesome free Lightroom downloads to make black and white photos here: ConclusionIt's worth taking the time to experiment with these different methods when deciding how to approach black and white conversion. Some may work better for you than others, but always remember to keep an original copy of the image if using a destructive method and ultimately, it's always better to work non-destructively, so you have the option to change your mind.
 |
| 43 Best T-Shirt Back Mockups (Using a T-Shirt Mockup Generator) Posted: 18 Jun 2021 07:00 AM PDT Looking for a great T-shirt back mockup to promote your latest designs?    Check out 43 of the best T-shirt back mockup templates from Placeit. They're all super easy to customise using a simple online tool, so there's no need for Photoshop or other complicated design software. How to Make a White T-Shirt Mockup Quickly & Easily1. Go to Placeit.net > Mockups > Search for Back of T-Shirts   2. Select a T-Shirt Back Mockup   3. Upload Your Design   4. Select a T-Shirt Colour   5. Download Your T-Shirt Back Mockup for a Small Fee   That's how to make a T-shirt back mockup in five easy steps. Now let's take a look at the best 43 back of shirt mockup templates to be found at Placeit.    43 Best T-Shirt Back MockupsShirt Mockup Front and Back With Couple   Why spend hours trying to create your own T-shirt mockup when Placeit offers hundreds of amazing mockups ready to download, like this shirt mockup front and back. It allows you to showcase a design for both the front and back of your T-shirt side by side. Black Shirt Back Mockup Featuring Woman With Phone   Need a black shirt back mockup? With Placeit, you can create T-shirt mockups in any colour you need with just a few clicks of the T-shirt colour button. With some mockups like this one, you can even change the background colour too. T-Shirt Back Mockup With Solid Background   Most designs for T-shirts focus on the front, so make yours stand out by focusing on the back. This back of T-shirt mockup will help you show off your design to its best advantage. Black Shirt Front and Back Mockup in Park   Show the versatility of your designs with this black shirt front and back mockup. It's easy to upload your designs with the Placeit T-shirt mockup generator. Back of T-Shirt Mockup With Painter   This is an excellent back of T-shirt mockup for quirky quote designs or logos for a range of companies. Why not try yours out and see how it looks? Shirt Mockup Front and Back in Bed   Here's a sweet shirt mockup back and front for romantic designs. A great option for showing clients exactly how your his-and-hers designs translate in a real-life scenario. T-Shirt Back Mockup of Girl Feeding Chickens   Have you created a T-shirt design specifically for children? Are you looking for a terrific back of shirt mockup for kids? Then this is a great choice for you. Upload your mockup with the online T-shirt mockup generator, and your mockup will be ready in seconds. Black T-Shirt Mockup Front Back of Couple in Cityscape   This black T-shirt mockup front and back is an excellent option for designers who want to showcase both the front and back versions of a design in a playful and engaging way. Upload your design and see how it looks in a real-life scenario. White T-Shirt Mockup Front and Back of Couple in Business Area   Placeit's online T-shirt mockup generator provides loads of template that use the same models in different poses, so if you love the couple above but need a different pose or scenario, check out this white T-shirt mockup back and front template. T-Shirt Back Mockup at Beach   Here's a lovely summery T-shirt back side mockup for showcasing your designs, logos, or powerful quotes. Professional black tee-shirt mockups at your fingertips. Black T-Shirt Mockup Front Back Against Neutral Background   All of the T-shirt mockup back and front templates we have showcased so far feature couples, but here's a different mockup. This black T-shirt front and back mockup features the same model. Use it to show the same design from the front and back, a complementary front and back design, or whatever combo your heart desires. Black Shirt Front and Back Mockup With Woman   If you need the female version of the black shirt front and back mockup above, here it is. As with the design above, it features the same model with front and back views. White T-Shirt Mockup Front and Back With Female Model   All of Placeit's mockups are shown in white by default, so if you need a white T-shirt mockup back and front template, you'll find plenty at Placeit. The thing to remember is that Placeit T-shirt mockups are a blank slate for you to create any colour and upload any design your can imagine. T-Shirt Back and Front Featuring Couple Outdoors   This is another great selection for those looking for a black and white shirt mockup. It features a couple on a hike or out for some exercise. A terrific template to compare how your design would look on two shirts of different colours. T-Shirt Back Mockup With Man in Park   When you need a distinctly urban setting for your back view of a T-shirt, this T-shirt back side mockup is an excellent choice. Just pop your image in there using the T-shirt mockup generator, and voila! White T-Shirt Mockup Front and Back With Couple on Lawn   Placeit has an endless supply of white T-shirt mockups front and back. This one with a young couple lying on the grass is a great choice for showing off both the front and the back of your design. Black T-Shirt Mockup Front and Back   Romance is in the air! If you want to promote your brand or design for Valentin'es Day, or if you just love a good, positive vibe, then this is the ideal shirt mockup back and front template for you. Black Shirt Back Mockup With Woman in Street   Some shots are natural, and others feel posed. Either can work, depending on what you want to communicate. This is a posed shot, with the model's hair carefully swept over her shoulder to reveal your design. Black Shirt Front and Back Mockup With Couple Outdoors   Here's the happy couple again, except this time their positions are reversed, so that the front of the man's T-shirt and the back of the woman's are visible. Use it alone or in combination with the earlier one to show different variations of your design. T-Shirt Back Mockup With Woman Against Neutral Background   The bright orange hair and unusual clasping of the hands behind the back make this a striking, eye-catching shot. Just note that the hands will cover the bottom part of your design, so make sure your tagline doesn't get lost. T-Shirt Back Mockup Featuring Couple Running   If you're going for a healthy, exercise-driven vibe, this sunny beach shot is ideal. It makes exercise look like fun, and it puts your design at the centre of it. What could be better? Back View T-Shirt Mockup of a Red-Haired Woman Facing a LakeThe sea is a great place to get away from it all and gain a fresh perspective. Associate your brand with that aspiration by placing it in this peaceful, beautiful scene. Black T-Shirt Mockup Front and Back With Couple   There's a nice constrast here between the desolate urban scene and the intimacy of the couple gazing into each other's eyes. That could make this mockup work really well for showing off your design. T-Shirt Back Side Mockup   Sometimes, simple is best. The plain white background of this image and the neutral pose of the model mean that there's nothing to distract from the most important element: your cool T-shirt design! White T-Shirt Mockup Front and Back Featuring Twin Sisters   These two little girls look like identical twins, but are they? The second girl's half-turned face makes it slightly ambiguous. While people are looking and trying to work it out, they'll notice your design (or designs) on the front and back of the shirts. T-Shirt Back Mockup With Runner   This looks like a beautiful early-morning moment of quiet introspection. The bridge in the background is also a nice visual metaphor, perhaps suggesting change or a journey to something new on the other side. See how your design would fit in this scene! Back of T-Shirt Mockup With Couple on a Hike   Or here's a happy scene featuring a couple out hiking in some beautiful countryside. Unlike many of the couples featured here, this one only gives one space for your T-shirt design, but that might be just enough. Black Shirt Back Mockup of Man in Industrial Area   This model's tattoos and physique, combined with the grungy industrial scene, give the black shirt mockup a tough, gritty vibe. If that's the look you're going for, this is the perfect mockup for you. T-Shirt Back Side Mockup With Men at Pride Parade   The rainbow flag catches the eye here, but when you look more closely, you'll also notice the rainbow cups they're holding and the rainbow bandana around one man's neck. Show your support for Pride Month or the LGBTQ community by placing your T-shirt design in this scene. Back of Shirt Mockup With Male Runner   This is an excellent shirt back of T-shirt mockup for fitness enthusiasts, so if your designs or logos relate to fitness, take this mockup for a test run. Back of T-Shirt Mockup With Woman in Mirror   Looking for something a bit more artsy and elegant? Then this black shirt back mockup is a great choice. Simply use the "Insert Image" button to upload your design, and just like that, your image is ready to download. T-Shirt Back Side Mockup Featuring Man on Sand   How about this back of shirt mockup? It's a great choice for your summer-themed designs and adventure company logos. Best of all, it's super easy to customise with the online Placeit T-shirt mockup generator. Back of Shirt Mockup With Skateboarder   Here's another winning back of T-shirt mockup. This one, featuring a woman holding a skateboard and looking off in the distance, has a touch of whimsey. Use it for inspiring quotes or designs. Black T-Shirt Mockup Front and Back Flatlay   Sometimes you just need a simple flatlay to showoff your designs. For those times, there is this fabulous, black T-shirt mockup front and back template. You can change the background to any colour you like or choose the transparent option to integrate the mockups into your own background. T-Shirt Back Side Mockup With Biker   Have you created the perfect logo for a cycle shop or club and need just the right back of T-shirt mockup to show it off? How about this gorgeous template showing a man relaxing next to his bicycle after a long ride. Back of Shirt Mockup With Couple Against Ocean Background   Here's the ideal back of shirt mockup for travel and adventure clubs. Adding your design will be the icing on the cake. Back of T-Shirt Mockup in Plant Nursery   Need your client to see how their logo would look in a photorealistic context? Try this back of shirt mockup. It's excellent for nature- and gardening-related companies. Back of Shirt Mockup With Child and Parent   How sweet is the mother and child photo? You don't have to imagine how your design would look on this back of T-shirt mockup. Just use the "Insert Image" button to upload your design. Experimentation is free at Placeit. You only pay for your design when you are happy with it and ready to download. 3 Back of Shirt Mockups   Let's say you need not just one T-shirt back side mockup, but three. Well, here you have it. Three in one. There is a separate "Insert Image" button for each mockup, so you can add a different design for each child, or you can add different variations of the same design. The choice is yours. Black Shirt Back Mockup   Here's the perfect black shirt back mockup for a construction company logo. An added bonus is that you can also add your logo design to the sleeve of the T-shirt. How awesome is that? Cap and Back of T-Shirt Mockup   Need a T-shirt and cap mockup combo? Well, here it is. Upload your designs using the two separate "Insert Image" buttons, and your cap and back of shirt mockups are ready to use. Love Inspired T-Shirt Mockup Back and Front   When love is in the air, you need just the right mockup to help your romantic designs to shine. How about this white T-shirt mockup front and back? Nothing says love more clearly. Black Shirt Back Mockup Against Transparent Background   Sometimes you need a photorealistic mockup with a transparent background that you can blend into backgrounds of your choice. For those occasions, there is this black shirt back mockup. Of course, you may prefer a background with a solid colour, and if that's the case, just use the colour picker to select the colour of your choice. Choose Your Favourite T-Shirt Back Mockup TodayNow that you've seen the best T-shirt back mockups available at Placeit, head on over to the site and customise your favourite T-shirt mockup today. And if you're interested in other cool T-shirt mockups, check out these roundups of the best resources available at Placeit:
 |
| 19 Best Free Science & Technology Google Slides Themes (Presentations 2021) Posted: 18 Jun 2021 06:55 AM PDT If you love science, you might be asked to give a presentation to share your big idea. You're building a presentation that helps your audience easily understand scientific concepts. A science technology Google Slides theme can help!    In the world of science and tech, the quality of your presentation impacts its success. Use a pre-built science Google Slides theme as a huge help in explaining your ideas. In this article, you'll see free and premium Google Slides templates for science. Premium science Google Slides themes from Envato Elements or GraphicRiver. They are advanced options for the best scientific presentations. The Best Science Google Slides Themes (With Unlimited Downloads)Free templates are common as a no-cost option. But for just a bit more, you can source the very best Google Slides themes for science and technology. Paid Google Slides themes for technology are always worth the investment. Before we look at the free template offerings, let's check out Envato Elements' unlimited download library. For a single flat rate, you unlock everything you might need - including Google Slides templates for science. That's a compelling offer. 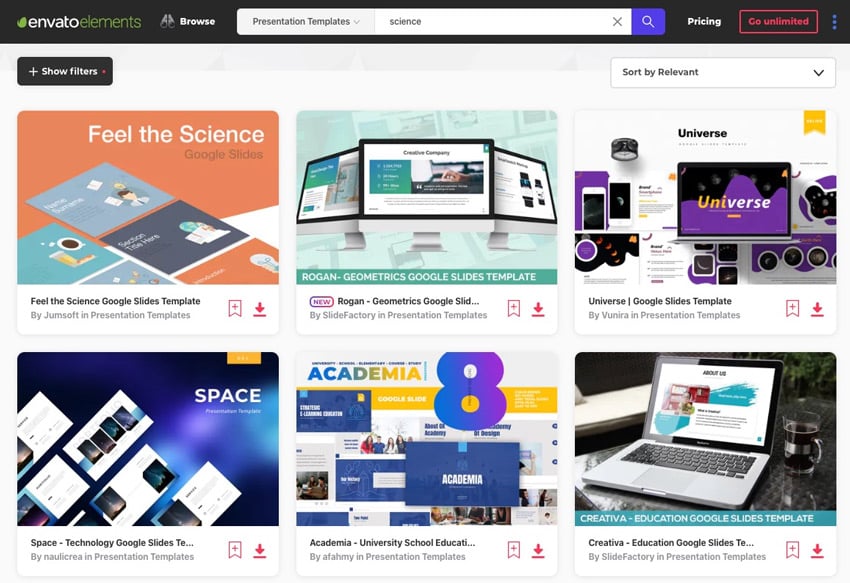   Unlimited downloads give you the freedom to experiment. The cost is barely more than the free alternative, and there are so many options to choose from! There are countless options for tech Google Slides themes. The templates you'll download on Envato Elements are professionally designed and supported. There are thousands of presentation templates, including the top science Google Slides themes. These science themes for Google Slides already have everything you need. 5 Top Premium Google Slides Themes for Science (With Unlimited Downloads)Elements is a deep library, so it helps to have a guide to the best Google Slides themes for science and technology. Here are five of our favorite Google Slides themes for science. They're all included with your subscription: 1. Feel the Science Google Slides Template   Feel the Science is our top Elements choice for science Google Slides designs. This is a robust template for any project. Twenty master slides help you quickly build out your designs, thanks to easy bulk edits. They're designed in the 4:3 ratio, perfect for any device. They also include the pre-built graphics, perfect for Google Slides themes science options. 2. Creativa - Education Google Slides Template   You might find free Google Slides theme science layouts around the web. But they can't match the professional quality of Envato Elements templates. Creativa includes dozens of flexible slide designs in one quick download. Use it for your next science PPT today! 3. Space - Technology Google Slides Template   Space is a Google Slides theme technology template made for you. Well-suited to any project, it's fast and straightforward to use. Over 30 slides are ready to help illustrate your next tech concept or idea. 4. Energon - Google Slides Template   Science templates for Google Slides like this one feature many helpful design options. here are features that make it one of the top options for Google Slides themes for science:
5. TechYou - Technology Google Slides Template   Helpful for any technologically driven slide deck, TechYou includes plenty of slides. It's a full collection of options for technology Google Slides themes. Choose between three distinct color layouts. Explore an array of font options. Work instructions are included to help you get started. Download Premium Google Slides Themes for Science From GraphicRiverEnvato Elements presents an all-you-can-download option, but it's not the only marketplace. GraphicRiver, another Envato Market, has great designs for science Google Slides themes. Download and pay for them one-at-a-time.    Pay for single science Google Slide themes with the best designs on GraphicRiver. If you know exactly what you need, it's a great marketplace for you. Here are five of the best science templates for Google Slides: 1. Education Google Slides Presentation Template   Templates like this are the winning choice for your next science and technology slide presentation. This example focuses on education, helping you teach your concepts to any audience. Over 800 slides cover every angle. They also include custom placeholders to add content of your own easily. 2. Medical Google Slides Presentation Template   Science templates for Google Slides include all branches of medicine. The Medical Google Slides Presentation Template supports all of them. It allows you to customize it with a few clicks. Each slide is ready to edit to build something special. 3. Business - Google Slide   Technology and science are integral parts of many companies. You'll see this shining in this powerful premium template. With the download, you'll unlock almost 300 slides and a suite of editable icons throughout. 4. Creative Gradient - Google Slide   These high-tech slides comprise a presentation sure to wow every audience. Explore design options like:
5. Inspired Multipurpose Google Slide Template   As the name suggests, these tech and science Google Slides are ready to aid nearly any project. They share a sleek universal design but enable the end-user to tailor each to their own needs. 19 Free Google Slides Themes for Science (And More)Before looking for a free Google Slides science template on the web, check Envato's free offerings first. Try out various premium template files (not always Google Slides technology themes) at no cost to you.    Here's the deal:
Premium templates feature the best designs, but sometimes your budget is zero. In that case, we've rounded up a selection of the best free Google Slides themes for science and tech topics. Let's look at 19 of the best options. Note: The free Google Slides templates linked to here are hosted by their respective sites. Their availability depends on the hosting site. Also, some of these free templates have special terms. For example, they may only be available for non-commercial use. Read the terms of use carefully before you download a template. 1. Science Google Slides Theme   These free science templates for Google Slides are a basic starting point. They're usable for science presentations. While not as powerful as premium options, they provide a simple intro for ideas and concepts. In total, the deck includes 25 slides. 2. Free Technology Google Slides TemplateThis elementary technology opener is a useful starter pack. You'll find 23 slides in the download. Other features can be customized using Google Slides' built-in editing tools. 3. Educa Free Google Slides ThemeIt's never too early to begin teaching science and technology to students. This free Slides theme is meant for that purpose. It includes layouts tailored for young learners. Drop in your content and get ready to teach. 4. Blackboard Free Google Slides Template   Blackboard graphics like these add visual interest to the dullest topics. Designs like this can be useful when illustrating tech and science ideas, especially in the classroom. Drag and drop your material onto each slide to make them your own. 5. Seyton Free Google Slides ThemeIt isn't necessary to have slides pre-made to exactly match the topic you're presenting on. Also useful is the ability to customize them yourself rapidly. Twenty-five slides are included in the Seyton pack to help you do just that. 6. Omega Med PowerPoint Template Keynote Google SlidesSome Google Slides theme science designs like this incorporate medicine into their areas of focus. Options here include:
7. Neptune Free Google Slides Theme   Space-inspired science Google slides fall under the umbrellas of both science and technology. These include plenty of room for illustrative graphics like photos and videos. Don't forget to customize your fonts, as well. 8. Health Med PowerPoint Template Keynote Google SlidesAnother health-inspired tech theme for Google Slides, Health Med uses a dark background to make text and graphics stand out. Every design feature can be customized as you create a slide deck. Be sure to check out the default layout options in Google Slides for more choices. 9. Free Creative Google Slides Theme   Resizable graphics make this tech Google Slides design useful for those looking to share a lot of photos, perfect for tech. Drag and drop them onto the canvas and scale them to fit. Free fonts are used to add descriptive text. 10. Aliena Presentation TemplateFuturistic graphics make this template a worthwhile visual aid for technical presentations. Over two dozen slides are built in. Each includes a simple set of placeholders. 11. Saleiro Presentation TemplateWhether you're giving a lecture on science, technology, or a different topic, Saleiro has a versatile set of multipurpose slides that you can use. Add text to support your key points. Then style the colors to match using Google's editing options. 12. Typing on a Laptop Google Slides Theme   A laptop computer forms the visual centerpiece of this free Google Slides template pack. Included inside are:
13. Free Modern Google Slides TemplateScience Google Slides themes sometimes embrace a minimalist aesthetic to bring content forward. Such is the case here. The set of included slides leaves most of the design work up to you, with text boxes and placeholders ready on each one. 14. Concept Free Google Slides ThemeIt's possible to talk about science and technology concepts. But it helps to have a visual aid. This simple concept Slides theme for tech comes with 11 slides that you can use to support your big ideas, key points, and more. 15. Abstract Binary Code Google Slides-PowerPoint Presentation   Binary code lies at the heart of much science and technology. It also forms the backbone of this free Slides template design. All elements of the slides are editable within the Google Slides app, making them simple to adjust to your project goals. 16. Thaliard Presentation TemplateThaliard is geared towards text-heavy presentations. These are often found with science concepts and technological discussions. Make sure to explore custom fonts and color options to mix up the styling. 17. Cordelia Presentation TemplateFor an assortment of projects, Cordelia is an option, with simple placeholders and minimal clutter. All it takes to build your slide deck is your content added in. 18. Researcher Medical Google Slides-PowerPoint Presentation   Choose from different style and design themes in this Google Slides medical science deck, including:
19. Zane Free PowerPoint TemplateRounding out our list of science Slides templates free, Zane has a collection of slides that can be adapted to most projects. Lean on Google's editing tools, including color options, layouts, and more. How to Quickly Customize Science & Technology Google Slides ThemesOne of the best things about premium science Google Slides templates is their ease of use. Customize them in just a few clicks! Follow these five quick steps to make any tech Google Slides theme into an amazing slide deck of your own. To follow along with this quick tutorial, download the premium Google Slides templates for science, Energon, from Envato Elements.    Let's start customizing: 1. Select Your SlidesGoogle Slides themes science designs often include dozens (or even hundreds) of custom slides. To deliver a winning presentation, you should choose only those that you truly need. The easiest way is to click on the View tab and then choose Grid View.    You'll see an outline of the full slide deck. Click and drag slides to reorder them and delete those you don't need by pressing Delete on your keyboard. Once you're finished, go ahead and click Grid View again to return to the individual slide view. 2. Customize TextAny Google Slide template technology deck will have plenty of custom text placeholders. It saves you the time and effort of adding your own text boxes.    To customize one, simply highlight any block of text. Then, you can start typing. That's all it takes! Repeat throughout the deck as necessary. 3. Change FontsOnce you've added text to your technology Google Slides theme, you can change it even more. With text selected, find the Fonts section on the menu bar, just above your slide.    There, you can change the font style, color, size, and more. Plus, you can add text effects like italics and underlines. 4. Add an Image BackgroundVisuals bring new life to your favorite science Google Slides presentations. A unique, easy way is with an image background. Even better: this science theme for Google Slides has that option built-in!    Begin by clicking on the placeholder itself. Then choose Replace Image from the dropdown above. Click Upload From Computer, browse to an image file, and click Choose. Slides will instantly import your photo, sized and scaled to fit perfectly. 5. Change Shape ColorsMany Google Slides templates science decks have stunning color palettes included! But you can still customize them. For example, when you're working with a shape, you might want to change its color to help call attention to it.    To get started, click on any shape to select it. On the menu, you'll see a Fill Color icon. Click it, and from there, you can pick a color on the drop-down. You'll even be able to apply gradients or paste in a color hex code for an exact match! More Top Google Slides TemplatesYou've already seen great tech Google Slides themes and science Google Slides templates. There are many more templates that help presenters save time. See more of the best Google Slides templates in our articles below. We work hard to always show you the best of the best. Here are great templates. Many of them could even work as science Google Slides templates with customization:
5 Benefits of Using Professional Science & Technology Google Slides Themes (For 2021)Still thinking about where to source your next science Google slides template? While free options are available, it pays to use professional, premium templates from Envato Elements. Let's check out five of the top benefits of using a premium Google Slides theme for your next 2021 presentation:
Benefits of Envato Elements (Unlimited and Unmatched)   Why use Envato Elements? The benefits are unmatched. For a flat monthly rate, you'll unlock unlimited downloads. That's right: you can try as many Google Slides templates as you want! Sign up for Envato Elements now. You'll instantly have access to thousands of presentation templates, along with stock photos, music, and so much more! Common Google Slides Questions Answered (FAQ)If you plan on using a science theme for Google Slides, you might have a few questions. Here, we'll look at five of the top Google Slides questions that people often have: 1. Can I Use PowerPoint Themes in Google Slides?Yes! Google Slides works well with PowerPoint themes. This gives you incredible flexibility. You can use your favorite tech Google Slides theme, or your favorite PPT theme to make a presentation. Once you import a .PPTX file into Google Slides, click on it and choose the Open with Google Slides dropdown. Google Slides will convert and open the PowerPoint. In seconds, you can transform any PPT into a new science theme for Google Slides. Learn more in our tutorial: 2. Is it Easy to Print Science Google Slides?Yes! You can print your Google Slides templates science decks and share them in handout form. A great option is to print many slides on a page. This saves time, and trees. In Google Slides, navigate to the File > Print Settings and Preview menu. Then, choose how many handout slides to print from the dropdown. Learn more here: 3. Do I Have to Be Online to Use Google Slides?No! Google Slides has features that help you view and edit your tech Google Slides theme, even if you're offline. This enhances flexibility and avoids a common worry about cloud-based presentations. For full details on using science Google Slides offline, view our tutorial: 4. Can I Create My Own Google Slides Themes Science Layouts?Sure. It's easy to create your own Google Slides layouts. With a few steps, you can build one-of-a-kind designs that fit your content perfectly. This works best when you use premium Google Slides templates science that do the design work for you. Here's more information in handy tutorial form: 5. Can I Add New Fonts to Google Slides?Absolutely! Premium Google Slides themes technology will often include their own custom fonts. But it's easy to add your own, helping style your text into something absolutely unforgettable. Start off by visiting the library of custom fonts on Envato Elements. All are included with your membership, and work with any technology Google Slides theme. Then, turn to our helpful tutorial to get your favorite fonts added to Google Slides: Learn More About How to Use Google SlidesOnce you start working with science Google Slides templates, you might realize that you don't know how to use every single feature. That's okay, we've got you covered with helpful learning resources. On Envato Tuts+, we've invested in building the deepest library of Google Slides tutorials. Readers use these to level up their skills and save time while designing a presentation. We've compiled them in a helpful resource, How to Use Google Slides (Ultimate Tutorial Guide.) Here are three tutorials to pair with your new Google Slides template for technology or science:
5 Tips to Better Science & Tech Google Slides PresentationsScience presentations run the gamut in terms of content and topic. But no matter what you're covering, these tips are guaranteed to help you give your best presentation. Read on to see the best tips for scientific presentations. For even more tips, make sure to check out our comprehensive resource, How to Use Google Slides (Ultimate Tutorial Guide.) It's got everything you need to master this browser-based presentation app. 1. Cite Your SourcesScience is a fact-based topic area. Your audience relies on reliable sources, so don't forget to include citations. You can cover citations either on the slide or as a speaking point. The critical part is backing your presentation with the facts that matter. Learn more tips for truly professional Google Slides presentations in our guide below: 2. Use an Explanatory InfographicScience isn't everyone's favorite topic. But when you explain it, ideas are more intuitive. It helps you reach more audience members. Complex concepts are more comfortable to follow in an infographic. With the help of an infographic, you can explain ideas easily. An infographic combines information and graphics, as the name implies.    3. Spend the Majority of Time on PreparationToo often, our first step while writing a presentation is to open the app. This leads to a circular cycle of writing, re-writing, and rearranging objects on a slide. To avoid this, write most of your presentation before you open Google Slides. The success of a scientific presentation is based on content, even more than with other topics. You should spend most of your time brainstorming and writing your presentation. Make sure to check out our article below for tips on preparing for your presentation: 4. Show Data With VisualsWant to excite your audience about science? Use data and statistics that show progress or a promising future. Make sure you don't overwhelm the audience with too much data. Convert simple statistics into charts and graphs to make it easier to understand.    5. Show Progression With a TimelineThe exciting part of science is watching how things change. Breakthroughs, advances in research, and progress inspire audiences. The best way to show this is with the help of a timeline. Timelines are used to link events and chart a course to the future. They're perfect for displaying a scientific concept in your presentation. Use our tutorial below to create an excellent timeline for Google Slides: 5 Top Google Slides Theme Trends (For 2021 Presentations)We've seen some of the top Google Slides templates science designs available today. They're the perfect way to start making your own science Google Slides presentations. But for max impact, consider embracing the very latest trends. These are the best ideas for 2021 Google Slides themes science: 1. Sleek Image MasksAny science theme for Google Slides will benefit from the use of images. But once you've added some, you're not finished making style choices. Consider using image masks. These shape images into beautiful works of art, thanks to geometry.    A premium technology Google Slides theme will often include image mask placeholders. All you've got to do is add your own photo and let the template do the work. These are stylish and more popular than ever in 2021. 2. Crisp Animations and TransitionsWith your Google Slides themes technology presentations, you're trying to inform an audience. You want to control the pace of your presentation. Subtle, crisp animations are trending in 2021, for good reason. They help you keep things moving at your own speed. Plus, they won't distract your audience. Thanks to science Google Slides themes, animations and transitions are easy to add. In fact, they often come built-in to your technology Google Slides theme! For a full look at animations in Google Slides, check out our tutorial now: 3. Beautiful Color GradientsSolid colors are so last year. Trendy, modern designs use color gradients instead. These span a range of hues, rather than sticking to one solid shade. That adds a cool, eye-catching effect.    Google Slides templates science with color gradients will impress even the toughest audiences. They help you illustrate your science Google Slides and tech Google Slides theme. Built by creative experts, they deliver studio-quality design to your own work. 4. References With Hanging IndentsChances are, you might be using a science theme for Google Slides in a school or research project. That means you may need to add references. In 2021, you don't have to improvise. Research science Google Slides decks should use hanging indents on their reference slides. Hanging indents are a breeze to set up in Google Slides. We built a quick tutorial for you. The process works well with the Google Slides themes science deck of your choice. 5. Infographic VisualsWhen you use Google Slides themes science and tech designs, you're trying to explain ideas to an audience. Why bore them with words? In 2021, people demand infographics to illustrate your ideas. These are illustrations that combine information and graphics into one.    To save time, it pays to choose a premium tech Google Slides theme with infographics built in. Once you do, all you've left is to fill in your key details! You'll have amazing infographic science Google Slides ready in no time. Design a Science Presentation With a Google Slides Template TodayIn this article, you've seen the best free and premium options for a scientific Google Slides presentation. With the help of a great template, your presentation is sure to be a scientific success! Remember: free science Google Slides themes are a good start. But for the best designs, support, and more, premium Google Slides templates are worth the investment. Download unlimited science Google Slides templates on Envato Elements. Or pay-as-you-go with Google Slides themes for science on GraphicRiver. Either way, these advanced templates can help you build a presentation today! Why not get started now? Editorial Note: This post has been updated with contributions from Andrew Childress. Andrew is a freelance instructor for Envato Tuts+.  |
| 30+ Aesthetically Pleasing PowerPoint Templates (Free + Premium PPT Designs 2021) Posted: 18 Jun 2021 05:55 AM PDT Great presentations feature great content. But it's not the only part of the package. You also need to present your PowerPoint in an aesthetically pleasing manner. Try using an aesthetic PowerPoint (PPT) template.    An aesthetically pleasing slideshow is a must so that your content doesn't go unnoticed. The problem is that most of Microsoft's built-in templates aren't what I would call aesthetically pleasing PowerPoint templates. Use these flat templates, and you run the risk of losing your audience to yet another boring PowerPoint presentation. That's why we use custom aesthetic PowerPoint templates as an alternative. When you use professionally created designs, you already have all the slides that you need for a successful presentation. In this article, all the templates give you aesthetic PowerPoint ideas! They've got all the needed placeholders so that you can drop your content in. Let's jump in. 5 Best Aesthetic PowerPoint Templates From Envato Elements (Premium PPT 2021)When you're looking for aesthetic PowerPoint ideas, don't think that you've got to do it all from scratch! The best PowerPoint presentations often start with a bit of help. That can come in the form of premium aesthetic templates from Envato Elements.    Premium aesthetic PowerPoint templates from Envato Elements are the best way to show off your ideas. The offer is unbeatable: For the price of a monthly subscription, you'll have unlimited access to the Envato Elements digital asset library. That means unlimited downloads of aesthetic slideshows, fonts, WordPress templates, and more.    In this section, you'll see premium aesthetic template options from Envato Elements. Download and try them for the most aesthetically pleasing PowerPoint slides you've built. 1. Muli™ Minimalist PowerPoint Presentation   MULI is an aesthetic template for PowerPoint with minimal design. The touches of color on each slide add to the modern style of the presentation. With 90 unique slides at your disposal, you'll have an easy time creating the aesthetic PPT you need. 2. Svage PowerPoint   Are you starting a fashion house or running a boutique creative agency? Svage has the perfect, stylish look for display videos or a client pitch deck. The design is minimal and has vibrant colors. Svage includes 35 slides, so you can create your aesthetic presentation. 3. ATTRACTIVE – Multipurpose PowerPoint Presentation   ATTRACTIVE is a beautifully crafted aesthetic PowerPoint presentation. With 25 different slides, 10 color themes, and custom image placeholders, you'll find slides ready for all types of content. Also included are pre-built animations and transitions to help everything flow smoothly. 4. Visionary - Attractive PowerPoint Design   A top choice in aesthetic PowerPoint templates, this flexible design is ready to support any message. Quickly adapt it to your brand with over 20 color themes included. Then begin adding content with 80 unique slides and a large icon pack. 5. G E O M E T R Y Minimal PowerPoint Template   This minimalist offering makes use of geometric patterns. The results makes some aesthetically pleasing PowerPoint slides. Whether you're a startup founder, marketer, or project manager, this one is an excellent choice for you. It comes with 77 custom slide themes and over 200 icons. 5 More Premium Aesthetic PowerPoint PPT Templates From GraphicRiver (For 2021)If you think you won't take advantage of an Envato Elements subscription, head over to GraphicRiver. You can find premium aesthetic templates for PowerPoint, but available for single purchase. Just like Envato Elements, GraphicRiver items have a clear usage license.    Here are five top aesthetic PowerPoint presentation templates available from GraphicRiver in 2021: 1. Beauty Market PowerPoint Presentation Template   The beauty industry thrives on aesthetics. That's why Beauty Market is the perfect template for your spa or beauty product line. This aesthetic slideshow has 51 different sides in full HD resolution. Each slide is fully animated. Edit what you need in a matter of clicks. It even has a help file if you ever have trouble getting started. 2. UNIGRAPH - Minimal & Portfolio Template (PPTX)   Unigraph is a creative, versatile presentation template for PowerPoint. Its design places a heavy emphasis on letting imagery do the talking. Adding your photos is easy thanks to drag and drop support. This aesthetic template has many useful elements, like charts, infographics, maps, and more. You'll love Unigraph's modern design for your portfolio. 3. Smart House PowerPoint Presentation Template   Blue is a popular color in design this year. SmartHouse uses it effectively in this aesthetic presentation. The theme is minimal but leaves room for your brand to make its mark. On top of 51 unique slides, SmartHouse includes:
4. Ronix Creative Theme   The Ronix Creative Theme is an aesthetic presentation driven by versatility. It's got over 300 slides and 16 custom themes, making it easily adaptable to your needs. Each shares an attractive, stylish design that any audience will love. 5. Attractive Pitch Deck - PowerPoint Presentation   An aesthetic template like this one will help you launch your business with PowerPoint. It's got all the elements of an essential business pitch deck:
Aesthetic PowerPoint Templates (Free Download)The choices above are some of the most aesthetically pleasing PowerPoint slides that you can find. Typically, premium aesthetic PowerPoint templates produce the best results.    Before looking for free aesthetic PowerPoint templates on the web, check Envato's free offerings. Try out various premium template files (not always aesthetic PowerPoint templates) at no cost to you. Here's the deal:
But sometimes, your budget has to be zero. In that case, turn to the free aesthetic PowerPoint templates with free downloads below: 1. Business Sales Presentation on Product or Service   Selling templates help you introduce your offerings to potential customers. This aesthetic PowerPoint makes use of architecture in its appearance, symbolizing growth. It includes a basic set of slides that you can customize after downloading. 2. Balthasar Presentation TemplateWith 25 slide designs, this free aesthetic template is built for numbers-based presentations. You'll find simple placeholders and basic transitions already added. They'll streamline the process of building slides. The dark background helps text stand out in a crowded room. 3. PolarisAesthetically pleasing PowerPoint slides have a few things in common. They use stylish custom fonts, sleek layouts, and beautiful images. All these are utilized in Polaris, across 100+ slides. 4. Roderigo Presentation TemplateThis aesthetic PowerPoint presentation uses graphics that appear hand-drawn to illustrate points. Adjust it by using PowerPoint's built-in colors. There are also charts, maps, and tables included that you can quickly fill in. 5. Free Coffee Beans PowerPoint Template   Using free aesthetic PowerPoint templates is a way to leverage unique designs. Such is the case here, with graphics made out of coffee beans. These are utilized across a set of simple slide layouts and placeholders. 6. Science Project Presentation (Widescreen)Sharing a science project isn't just about the results. It's also vital to show off data using an aesthetic, attractive design. This free template allows that, with lab illustrations and custom infographics built in. 7. Thaliard Presentation TemplateThe Thaliard template is a professional layout appropriate for data-driven presentations. The 16:9 layout fits popular widescreen projectors. Twenty-five unique aesthetic slide designs can be readily customized to fit your purposes. 8. Free Brush Strokes PowerPoint TemplateBrush strokes give this aesthetic PowerPoint template a handmade look. It's a helpful template if you're sharing off your art portfolio. The abstract design is flexible enough to fit in with many types of messages. 9. Abstract Squares PowerPoint TemplatesThis is a free multipurpose aesthetic PowerPoint design. Included are 48 slides and abstract graphics throughout. You'll find charts, infographics, text, photos, and more. 10. Water Colored Splashes PowerPoint Template   Thirty-six slides with a variety of layouts enable quick edits in this aesthetic template. The embedded charts are editable in Excel, to smoothly add in your data. The vector graphics are all adjustable. 11. Pastel Watercolor Painted PowerPoint TemplateAn aesthetic PowerPoint presentation like this one uses pastel colors in slide design. This attractive palette means that content stands out. Here, it stands alongside 135 icons and three dozen layouts. 12. Gear Icon Graphic PowerPoint TemplatesThese gear graphics bring aesthetic and attractive design to your business slides. They're offset against a dark yellow background and supported by a full set of content placeholders. Included are standard and widescreen versions. 13. Free Attractive PowerPoint TemplateThis simple aesthetic PowerPoint can be used for any presentation. Alter the colors with built-in themes and design options. Then drop in your content, and you'll have a slide deck ready in no time. 14. Free Golden PowerPoint TemplateThis gold template brings attractive colors to your slides. It includes three themes, based on gold, white, and dark gray palettes. Additionally, there are charts, icons, bullet lists, and more. 15. Free Pattern Presentation Template   A full set of layouts and themes comes with this free aesthetic PowerPoint template. There are 2,400 icons, 50 device mockups, and a map of the world. Creative flexibility lies in your hands. 16. DUOTONE | Free PowerPoint & Keynote TemplateDuotone has an attractive, ethereal style inspired by neon lights. Each element is customizable in PowerPoint, so you can easily make it your own. The pack includes a wide array of infographics and charts to visually illustrate data. 17. FREE - Ravi Presentation TemplateWith maps, mockups, and more, templates like this enable your aesthetic PowerPoint ideas. This design is print-ready and supported by widescreen displays. Custom content is quickly added right inside of PowerPoint. 18. WaveformWaveform delivers a simple aesthetic style in a 4:3 format. Creative edits are left up to you. In PowerPoint, you can insert your content onto each slide to fit your goals. 19. AtlasFree aesthetic PowerPoint templates like Atlas deliver a quick set of essential slides that you can adjust. This one contrasts your content against a clean background. Remember to explore PowerPoint's built-in color themes to change up the look and feel of your slides. 20. NOWCO - Free Corporate PowerPoint Template   This aesthetic PowerPoint template is made for your business. It uses free fonts throughout the plethora of unique slide layouts. The colors are rapidly adjustable using built-in tools for style. How to Customize Your Aesthetic PowerPoint TemplateOnce you've picked out what template you want to use, you'll want to customize it. In this tutorial, we'll use the premium Toetiec PowerPoint Presentation template.    In this tutorial, we'll use slide six. Here's what it looks like with no edits.    Here are five tips to help you get started with your customization: 1. How to Change the Background Color of Your Slide   To change the background color of a slide in your aesthetic PPT template, click on the Design tab. In the toolbar under the tabs, select the Format Background button. When you click on the Format Background button, a side panel appears on the right side of your window. Next, click on the Fill Color button and choose the new color you want. 2. How to Add an Image to a Slide   There are two ways you can add an image to a slide:
Then double click on your image and resize as needed. 3. How to Change the Color of an Object   Begin by selecting the object that you want to change the color of. Next, click on the Shape Format tab. In the toolbar, click on the Shape Fill button. When you click on the Shape Fill button, a color menu drops down. Select the color that you want from the color menu. 4. How to Add New Text to the Slide   To add new text to a slide, you need to add a text box to a blank space in your slide. First, click on the Insert tab. Next, click on the Draw a Text Box button in the toolbar. Then draw a diagonal line where you want the new text box to be on your slide. Now you can start typing. 5. How to Change the Color of Text   To change the color of text on your aesthetic PPT template, highlight the text that you want to change the color of. Next, click on the Home tab. In the toolbar under the tabs, click on the Font Color button. When you click on the Font Color button, a color menu will drop down. From the menu that drops down, click on the color that you want to change your text to. 5 Quick Tips to Make Your PowerPoint Presentation More Attractive in 2021Wondering how to make your PowerPoint presentation attractive? There are a few essential tips to keep in mind. These help you make the best impression possible with every slide. 1. Choose the Right ThemeBuilding an attractive PowerPoint presentation starts with your theme. It's essential to select a template that fits your needs. Premium aesthetic PowerPoint slides are built by professionals to support specific messages. For example, if you're sharing a lot of data, it helps to choose an infographic presentation like Chart Infographics PowerPoint.    As you can see, everything is in place for you to insert your data. The graphics are visually attractive and easy to understand. There's no need to create them from scratch. 2. Explore Custom FontsWhen you're creating a PowerPoint presentation, it's easy to fall into using the same basic fonts over and over. But to add interest and attractive style, it's best to mix up your fonts. PowerPoint includes dozens of fonts built into the app. Try out a few, making sure to customize the style and color too. Not finding an aesthetic template you like? Envato Elements has a custom font section with thousands of stylish designs. You won't find these anywhere else. 3. Use Plenty of ImagesNothing is less attractive than a boring text slide. It's imperative to use illustrations and images that support what you're trying to say. It's helpful to use aesthetic PowerPoint templates with an image-centric focus. The premium Photography PowerPoint template is a great example.    Audiences gravitate towards imagery. When used right, you'll capture their focus with photographs. Plus, PowerPoint makes it easy with a full suite of image editing tools built in. Quickly insert, crop, frame, reshape, and resize images right on your slides. Use these tutorials for adding images to build aesthetically pleasing PowerPoint slides:
4. Stay FocusedAttractive slides maintain focus on a single idea. There's nothing more distracting (and less engaging) than slides that try and cover many things at once. Keep in mind precisely what you're trying to do and add a few points and illustrations to support that goal. Avoid unnecessary, flashy graphics whenever possible. The secret lies in choosing (or creating) the right layouts. Fortunately, PowerPoint makes it easy to customize layouts to fit your needs, as you can see in the tutorial below: 5. Cut the ClutterWe've already talked about choosing the right layout to stay focused in your narrative. Along with that, it's crucial to reduce clutter on slides with aesthetic PowerPoint templates. Look to the premium aesthetic PowerPoint template, Native Minimalist for an example.    Remember, you may be presenting to a large room. Poorly aligned content, small fonts, and overused animations make slides unattractive and unreadable. Always keep text widely spaced and nicely contrasted with the background. Be positive images are large enough to be seen, and ensure content stays visible long enough for everyone to read. Make sure to use this aesthetic template customization tutorial below to learn more: Learn more about building aesthetically pleasing PowerPoint slides in our guide, Microsoft PowerPoint Templates (Ultimate Guide to the Best PPT.) It's a complete resource with everything you need to master PowerPoint. 5 Attractive (Aesthetically Pleasing) PowerPoint Design Trends for 2021Keeping your audience's attention during your presentation has a lot to do with your slideshow's look. Engage your prospective clients or customers. Add these 2021 PowerPoint design trends to your aesthetic slideshow: 1. Dark ModeFlip the switch in 2021. Aesthetic presentation design is shifting away from the usual white backgrounds. Many social media apps done this as well. There's a different look, but it's one that's welcome this year. It's easier on the eye and makes for a sharper presentation.    2. Vibrant ColorsMuted color palettes have dominated the presentation and design landscape for many years. This trend is a hard push back. Add bright and bold tones for a modern look. In 2021, fire engine red or bright orange will make a bigger splash than its pastel cousin.    3. Animations and TransitionsAnimations fall in and out of favor among the PowerPoint presentation community. But there's no doubt that they're effective in creating a fluid, aesthetic slideshow. Some aesthetic PPT templates include custom animations that you can use to follow this trend. Envato Tuts+ has a few resources for using and customizing transitions:
4. Isometric IllustrationsTypography can make what you're saying stand out even more. While PowerPoint comes with default fonts, you can find custom options that complement your content. If your typography stands out enough, use it as the visual focal point of your presentation. 5. Custom Image FramesPhotos are becoming more useful, and trendier, in a visually oriented world. Instead of using square or rectangle shapes, add some variety with unique frames. Curved lines, circles, triangles, and other designs make your presentation feel more spontaneous.    More PowerPoint Template Resources From Envato Tuts+Envato Elements and GraphicRiver are filled with aesthetic PowerPoint templates for any topic. If you're looking for something more specific for your presentation, Envato Tuts+ has articles just for you. Here's just a peek at some of the templates you can try:
Benefits of Using Premium Aesthetic Template PPTsThe free aesthetic PowerPoint templates you've seen maybe a tempting option. But there's a reason why premium aesthetic template PPTs are so popular. Here are some of the benefits your presentation will get from using a professional choice:
Benefits of Envato Elements (The Power of Unlimited Use)   Envato Elements is a one-stop-shop for all your creative needs. Subscribers get the ultimate benefit: unlimited access and downloads to the full library of creative assets. That means for the price of a low monthly fee, you get unlimited downloads of aesthetic template PPTs, custom fonts, music tracks, and more. No limits, no caps. You can sign up for Envato Elements today. Common PowerPoint Questions Answered (FAQs)Creating and giving aesthetic PowerPoint presentations in 2021 will still be an important part of the business world and student life. If you're new to PowerPoint or want to get familiar with more of its features, I'll answer some questions you might have: 1. How Do I Share My Presentation With Zoom?Zoom looks to be a popular way to connect and give presentations online. If you haven't presented this way yet, don't worry. First, open your PowerPoint and join your Zoom meeting. Click Share Screen at the bottom of the Zoom window. From the popup, click on your presentation, then click Share. There are other helpful features in Zoom you can learn about from this tutorial: 2. How Many Pictures Do I Need in My Aesthetic PowerPoint?This question depends on how the pictures complement your content. Pictures can play a big role in an aesthetic PPT. But you also need to think about what the images communicate to your audience. You should also look to find text that can be better explained visually with a photo. 3. Where Can I Leave Feedback on a Presentation?If you're working on your aesthetic template PPT in a group, this is an important question. Under the Review tab in PowerPoint, you'll see the option to create, revise, and resolve comments in the Comments group. Here you can leave notes, changes, and suggestions to your group. But did you know you can merge aesthetic presentations to review changes? Learn about the process here: 4. Should I Add Animation Effects to My Aesthetic PowerPoint?Transition and animation effects are great for making aesthetic presentations dynamic. You'd be surprised how important movement can be for engaging an audience. If you're working with data, your charts and graphs become more interesting with animations. If you don't know how, this quick guide will teach you: 5. How Do I Add Excel Data to My Presentation?Excel and PowerPoint are both Microsoft products. What does that mean? It means adding data from your Excel sheets can be done in a few clicks. In Excel, click on the chart you want to add to your presentation. Hit Ctrl + C on your keyboard (Cmd + C for Mac users) to copy. In PowerPoint, click where you want to add the data and press Ctrl + V (Cmd + V) to paste. You can find out more about this process and your paste options from this tutorial: Learn More About PowerPoint TemplatesWhether today is your first day or 1000th day using PowerPoint, there's always something to learn about the program. That's why we've put together the ultimate PowerPoint tutorial guide. Learn about everything from writing to designing presentations from Envato Tuts+. Here's a preview of some of the PowerPoint tutorials you'll find in our guide:
Design Aesthetically Pleasing PowerPoint Slides TodayThis article featured a round-up of the most aesthetically pleasing PowerPoint slides in free and premium templates. No matter which option you choose, an aesthetic template increases your presentation's effectiveness. Don't hesitate to use one. Some of the best aesthetic PowerPoint templates come from Envato Elements and GraphicRiver. And if your budget has to be gratis, the free templates shown above are a cost-conscious option that can't be beaten. So, what are you waiting for? Jump to a premium or free aesthetically pleasing template and drop your content into it today! Editorial Note: This post has been updated with contributions from Nathan Umoh, and Sarah Joy. Nathan is a staff writer with Envato Tuts+. Sarah is a freelance instructor for Envato Tuts+.  |
| 15 Best Web Fonts That Look Great at Small Sizes Posted: 18 Jun 2021 12:57 AM PDT Beautiful web fonts aren't particularly difficult to find. A quick search will undoubtedly turn up a number of attractive typefaces that will complement your website's look and messaging. However, many of these fonts tend to have very specific use cases. For instance, a wide font may be perfect for header text but would work poorly in the body of your page. And certain decorative fonts are only appropriate for limited use–perhaps no more than a full-sized word or two within a design element.    With that in mind, we'd like to introduce you to a selection of the best small letter fonts for web that offer a bit more versatility. They go beyond standard looks, yet are still able to be read at small sizes. Each one is available with your subscription to Envato Elements, home to an ever-growing library of thousands of web fonts. First, let's take a look at some areas where these small letter fonts can really shine. If you'd like to know what are web fonts or how to implement web fonts, we'll cover that after the selection of best small letter fonts. Small Letter Fonts, Big PossibilitiesA well-designed website is all about the details. And while it's often the big, over-the-top design elements that grab our immediate attention, the little things certainly shouldn't be forgotten. It's here where users are compelled to stick around for a while. The fonts in this showcase can help in both the big stuff (headlines, hero areas) and the not-so-big (buttons, blockquotes, sub-headings). This is good news for designers, as it offers the potential for more consistency in our projects.    That means, for example, you can add more stylish accents that reflect your brand across various areas of a website. A fancy font becomes something you are just as likely to use in your site's footer as it is in the header. Of course, legibility is still of utmost importance. So, be sure to test your designs and make adjustments as necessary. 15 Best Small Fonts For Web From Envato Elements For 2021If you're a web designer or programmer, you need a professional source of the best digital assets. Envato Elements is a great option. This subscription-based marketplace gives you unlimited access to thousands of assets. Download unlimited small letter fonts, web templates, WordPress themes and more.    Now, it's time to discover some small letter fonts! Here's a unique selection you can use to enhance your web projects. And since we're focusing on smaller sizes, we'll also sprinkle in some ideas as to where each may work best. 1. BD Megalona Text Serif Font FamilyBD Megalona is one of the best small fonts for web. This web font is inspired by the famous Times New Roman, which makes it one of the most readable small fonts. The web font small size is very complete. Megalona features an extended set of 1800 glyphs, covering 219 languages with Latin, Cyrillic and Greek alphabets. This small letter font also includes advanced open type features like stylistic alternates, swashes, ligatures and more. 2. Magnita - Serif Small Letter Font   If you think serifs are the best small letter fonts, you'll like Magnita. This HTML font size small will give you a luxurious look. Magnita web font small size includes uppercase and lowercase characters, along with open type features. 3. Odudo Mono - Sans-Serif Small Letter Font   Odudo is one of the most readable small fonts you can use. This bold sans-serif font is a great addition to your webpage. The small letter font shares the same width across all weights without losing the familiar geometric Odudo-feel. It comes with extended Latin support and contains four weights (Light, Regular, Semi-Bold and Bold). 4. Fiona - An Elegant Typeface   Fiona offers up a classic, elegant style that can be used just about anywhere. It would be a perfect fit for sub-headlines within content or even a sidebar. 5. Millefleur - Sans Serif Font Duo   This selection is actually a package of two separate-but-related fonts: Mille and Fleur. Mille is a traditional, easy-to-read bold font while Fleur brings some uniquely-styled letterforms. Put them together and you have a great combination for headings and subheadings. 6. Numhead Typeface   Numhead offers a techno-industrial look in three weights (light, regular and bold). Each one is crystal-clear, giving you the freedom to use the font all over. You might even consider utilizing it in short passages of body text that you want to emphasize. 7. Borderland Font   While handwritten fonts are very popular these days, they can also be difficult to read. That's not the case with Borderland, as each letterform is clear and legible. This one has the potential to be used for all manner of design accents. 8. Riley - A Modern Typeface   With a detailed, vintage look, Riley will provide your project a touch of class. And the unique style of its punctuation lends itself to being used for quotes and other standout elements. 9. Little Hearts Font   Little Hearts is a fun, casual typeface that is perfect for sites focused on crafts or kids. The included glyphs bring it to a whole new level, with playful illustrations that can be used to decorate areas big and small. 10. Solente - Web Font Small Size   This art-deco slab font is reminiscent of those used in the early 20th century. The ligatures are incredibly detailed, and the package also includes a set of alternates. Still, the HTML font size small might be most effective on short bits of text like sub-headlines or call-to-action buttons. 11. Manurewah - Web Font Small Size   An ultra-modern, square web font small size, Manurewah offers both a sophisticated and futuristic look. And, the use of capital and lowercase letters also allows for some distinctive combinations. You might use an all-caps look for large, single-word titles, with mixed-case text used for better legibility on lengthier passages. 12. Rodian - Serif Web Font Small Size   Featuring a sharp, clean look, Rodian Serif is a great choice for attracting attention. You'll find two styles and multiple font weights. Of particular interest is the stencil variant. It stands out as very unique, yet it also maintains legibility. Use it anywhere that you need to add an extra bit of personality. 13. Runalto - Luxury Serif Font   Runalto is a HTML font size small for the serif fans. This is one of the best small fonts for web. The small letter font features an elegant and classic look. You'll get uppercase and lowercase letters, multilingual characters, numerals and punctuation. 14. Laguna 7 Font - Small Letter Font   Are you looking for the best small letter fonts for your webpage? Laguna 7 is most readable small fonts. Just as it says, this HTML font size small is simple and useful. Laguna is a monospaced font in OpenType format, which includes letters, numbers and glyphs. 15. Morjuis - Serif Font   Morjuis is one of the best small fonts for web. This elegant serif font small size includes uppercase and lowercase characters. Its elegant design makes it one of the most readable small fonts for your project. Don't hesitate to try it! How To Implement Web FontsIf you want to start from the basics, you can read what are web fonts here. We've seen the best small letter fonts from Envato Elements. Now, let's learn how to implement web fonts. You can implement a custom web font into your site with just a few easy steps. But you'll want to note that it does require a little bit of CSS to get going. First, you'll want to make sure that any fonts you download include a version specifically created for the web. Envato Elements makes this process easy with handy filtering options on the sidebar. For instance, finding all of the fonts that are designed for use at smaller sizes and include a web version only takes a couple of clicks. Now, on to the steps: 1. Find a font you like and download it to your device. 2. Unzip the font package you've downloaded (remember to look for any web-specific fonts) and place the files into a folder within the root directory of your website. In our case, we'll just call it "fonts". 3. Upload the fonts to your web server, maintaining the directory structure you just created above. 4. Next, add each font using the CSS @font-face { font-family: 'Fiona Regular'; /* Change to your font's name. */ src: url('fonts/Fiona-Regular.woff'); /* Change to match your font file's location. */ } 5. From there, you can call your font anywhere within your site's CSS file. For example, if you'd like to use it with your H1 tag, you might add something like this: h1 { font-family: 'Fiona Regular'; /* Change to your font's name. */ } If you run into any problems, use your browser's inspection tools to verify that the font is installed correctly. Discover More Web Font Inspiration on Tuts+I hope you've liked this selection of the best small letter fonts for web and this quick tutorial on how to implement web fonts. If you'd like to explore even more helpful resources, take a look at these:
Start Using Small Letter Fonts Today!Unique web fonts that can stand up to use at both larger and smaller sizes are rare. Quite often, you're limited to utilizing a more decorative font on the former, while settling for something a bit more ordinary on the latter. However, our collection of the best small fonts for web remove much of this compromise. While each font may have its own specific limitations, each one also has a wider range of potential uses. This opens up the door to a whole new world of design possibilities. Feel free to experiment with the fonts above and see how they can dress up your website! Editorial Note: This post has been updated with contributions from Maria Villanueva. Maria is a staff writer with Envato Tuts+.  |
| How to Make Dripping Text in Photoshop Posted: 18 Jun 2021 12:00 AM PDT    Hello! Today I'm going to show you how to make dripping text in Photoshop using a few simple techniques. Also, we'll create different styles of bleeding letters. Let's go! Tutorial AssetsBefore we start learning how to make text drip in Photoshop, I want to show you which assets were used during the production of the tutorial: What You'll Learn in This Drip Effect Photoshop Tutorial
Follow along with us over on our Envato Tuts+ Youtube Channel: 1. How to Make Dripping Letters With a Displacement MapStep 1Open the stock image in Adobe Photoshop and Hit Shift-Control-X to open the Liquify Tool.    Step 2Use a big brush with a size of about 900 px and 100% Pressure to create a dripping texture like the one in the screenshot below:    Here's a close-up look at the displacement texture:    Step 3Now we need to save this texture as a PSD file (It's important to save it as PSD, because JPEG or any other file format will not work as a displacement map). Go to File > Save As and save it as Map.psd    Step 4Now let's create a New Document by pressing Control-N, and add any text you want to use.    Step 5After that, create a copy of your text layer by pressing Control-J, and then select the first text layer in the Layers panel.    Step 6Go to Filter > Distort > Displacement Map and set the Horizontal Scale to 0 and the Vertical Scale to 50. Then hit OK and select the map we created in the previous steps.    This is how our text should look now:    Step 7Now, we need to make our text look smoother. Go to Filter > Noise > Median and set the Radius to 12.    Step 8After that, just move this layer down a bit, and voila!    Step 9And finally, to make it look 3D, let's Group the layers and add a Bevel and Emboss style to this group with the following settings:
   This is what our final image will look like:    2. How to Make Dripping Letters Using the Liquify ToolStep 1As you might have noticed, the previous method is pretty rough. If you want to create a more precise dripping effect, you can use the Liquify Tool. Create a new text layer and press Shift-Control-X.    Step 2Set the Size to about 70 px and Pressure to 100%. Start creating drip elements using the Forward Warp Tool (W). Just stretch the parts of your words down.    Step 3Make the bottom elements of your dripping larger and the middle elements thinner to make it look like a drop.    Step 4Apply more drops using the same method. Feel free to experiment and create different types of dripping elements.    Step 5Make the lines of your letters less straight using the same Forward Warp Tool.    Add the same effects to all the remaining letters:    3. How to Make Dripping Text in Photoshop Using BrushesStep 1Let's apply some more dripping elements using our free brushes. Create a new layer with Shift-Control-N and add a brush stroke with the same color as our text.    Step 2Add more brush strokes until you get the result you like.    4. How to Create Bleeding Letters in PhotoshopStep 1Now I would like to show you how to add a realistic blood effect to your dripping text. Let's add a Bevel and Emboss layer style with the following settings:
   Step 2Put a tick on Contour and then add a Pattern from our assets and set the Scale to 150% and Depth to -2%.    Step 3Add an Inner Shadow layer style with the following settings:
   Step 4After that, use the following Inner Glow layer style:
   Step 5And finally, let's add Gradient Overlay and use the following settings:
   Step 6Let's go to File > Place and put a background from the tutorial assets below our dripping text.    Step 7And finally, if you would like to make the entire effect a bit smoother, you can Right Click > Convert to Smart Object on the group of layers and then add a Median Filter with the Radius set to 6 px.    This is what our dripping text effect will look like with this filter applied:    Awesome Work, You're Now Done!Today, you've learned how to make text drip in Photoshop using a few simple techniques. Feel free to experiment and combine them to get the perfect result.    Let's take a look at some of the best drip effect Photoshop products available at Envato Elements: Wet Paint Photoshop Action (ATN, ABR)This product will not only help you to create dripping text, but it will also add an amazing painting effect to any image! Every time you hit play, the action will make an unique, fully customizable result, so the variations of the end look are almost endless. Give this one a try!    Dripping Gold Photoshop Action (ATN, ABR)Wondering how to make dripping letters with gold textures applied to them? Check this amazing action, which will convert any image or text layer into a beautiful golden artwork. A video tutorial and text instructions will help you to use this product with no effort. Turn your image into gold like King Midas!    Paint Drip Text Effect (PSD)Are you looking for a simple drip effect Photoshop template? This easy-to-use PSD lets you create a dripping text effect in a few simple clicks. You can use any font and change the final look to fit your needs—just follow the TXT guide with instructions!    Bloody Mary: Bloody Thriller TypefaceIn case you need a blood dripping font, we have this amazing product with all letters, numbers, and punctuation. This blood dripping font can be really useful if you need to create a Halloween poster, horror movie title, or anything else with a similar style.    Inky Goodness (AI, ABR, TIFF)If you want to create a dripping text effect, you will also need a drip brush Photoshop pack like this one. It's a massive collection of different drops, drips, rollers, and brush strokes, with a total of 61 unique and high-quality brushes. This drip brush Photoshop package will be a great addition to your tools for creating amazing artworks.    Do you want to learn how to add a dripping paint effect in Photoshop or something similar? Check out these amazing tutorials:  |
| Build a WordPress LMS Website With the Masterstudy Theme Posted: 17 Jun 2021 01:31 PM PDT Let me show you how to create your own educational website (LMS) using a WordPress theme called "Masterstudy". What is An Educational Website?Before we dive into the theme, let's ask ourselves what is an educational website, and how can we create one of our own? An educational website contains various resources that enhance learning and supplement classroom teaching. Tuts+ is one such educational website, as it publishes tutorials and courses on creative subjects. Youtube can also be considered to be an educational platform, though not all its content is exclusively for educational purposes. To create your own educational website you have 3 main options:
Personally, I'll always favor option 1. So in this article I'm going to review a WordPress theme called Masterstudy and what it can do for your educational website. Introducing Masterstudy: Education WordPress ThemeThe Masterstudy WordPress theme made by Stylemix Themes is a great choice for creating an educational website. It has tons of useful features, 12+ premade templates, and it's fully translated in 8 languages. Let me quickly show you some of its features.    Import Demo ContentI'll show you the features as they're implemented in the cookery course demo. By importing the demo content I have a fully populated website with menus, content, imagery etc. Hero AreaThe homepage gives us a great hero section which shows off what the website does and draws the users in. It also houses the navigation which comprises site menu options, plus an admin menu (more on that in a moment), and a search feature.    Top CoursesThe top courses are displayed in a carousel format, with cards that reveal more information (like the rating, description etc.) when hovered over. There's a similar section lower down for recent courses too.    Categories Section and StatisticsUsers can jump into topics they'd like to learn about thanks to this nicely presented categories section. And the statistics section shows off some numbers about your educational website. All of this is fully editable of course.    Course PageClicking on one of the cards will open up the course on the course page. This is very nicely done in my opinion, and in terms of aesthetics the cookery template is my favorite. Each course has up to 5 tabs with various types of information:
The curriculum tab, for example, shows the course structure organized in chapters and lectures (lessons and quizzes).    Front End Course BuilderWhat I really like about this theme is its front end course builder. As a logged-in admin, you have the option to add course content via the back end, much like you would with any WordPress content, or you can use the interface on the front end. The front end builder allows you to add content in the same visual environment it will ultimately be published in. It's a far more intuitive way of entering course details.    Masterstudy WordPress LMS PluginIf you like the structure of the Masterstudy LMS, but you'd rather not use the whole theme and everything that comes with it, you can download a light version of their WordPress LMS plugin for free. You can then enjoy the power of this LMS with whichever WordPress theme your website uses. How to Set Up the Masterstudy ThemeOnce downloaded and activated, the first thing you need to do to benefit from demos and updates is to register the theme. The intro page will give you full instructions for generating a token which can then be used with the Envato API. With your token generated, copy and paste it into the box provided in the WordPress admin, and you're all set. You'll then be able to walk through the step-by-step process of setting up your website. Install DemosWith your website connected to the Envato API you can go to Install Demos and choose which of the premade templates you want to use. Again, I chose "cooking courses" as my template, and when clicked on the setup wizard asks if you'd rather use Elementor or WPBakery Page Builder as the engine behind your layouts. This is entirely up to you; I prefer to use Elementor.    Individual or Marketplace?The next step is to choose whether your website will be for an individual educator, or run as a marketplace for multiple educators. As a marketplace, your educational website will allow teachers to upload, promote, and sell their own content.    General SettingsMany of the general settings are self-explanatory; the setting up of certain pages and features for users, the setup for the course listings page, individual course page layout, opting to use WooCommerce checkout and guest checkout for the purchase of courses, that sort of thing. With the main settings all taken care of, you'll either import some demo courses or add your own courses to finish. Build Online CoursesWhen it comes to building online courses Masterstudy makes it super easy for you. As we discussed earlier, you can go into the admin and go STM LMS > Courses to add courses much like you would any other WordPress content. Or you can use the much easier front end course builder. To do this, go to your account page on the front end and click Add New Course. Specify a course title, choose a category, upload a course image, setup a description, add various course materials (helper files etc.) and then under curriculum you can start adding your course structure. Do this by adding sections, and then lessons within them. For each lesson you have some further settings. You can add an image, some textual content, then under lesson settings you can determine whether it's a textual lesson, video, or slides.    Besides lessons you can also add quizzes, which are a super powerful way of getting your users to test their knowledge throughout the course. Under the FAQ tab you can address questions which commonly arise about the course. Then under the announcements tab you can post whatever information you feel all students should be aware of; changes to the course material, or useful tips. Sell Online CoursesThe last (important) feature to mention is setting a price. By setting a price for your course you can make it available for paying customers. They add it to their basket and checkout.    Alternatively, Masterstudy comes with a Paid Memberships Pro integration which allows you to sell courses on a subscription basis. You can even sell courses in bundles using the Course Bundle add-on. There are plenty of options! With all that done, either save your course as a draft, or publish it directly. Other Useful Educational FeaturesSome other really nice features from Masterstudy include:
   ConclusionMasterstudy is a really solid way of building your own educational website for WordPress. It's intuitive to setup, has a ton of useful features, and by connecting to the Envato API you can make sure your website stays up to date too. Check it out today and get educating! Useful Resources |
| 44 Best Plus Size T-Shirt Mockups (Using a T-Shirt Mockup Generator) Posted: 17 Jun 2021 08:00 AM PDT When you need a terrific plus size T-shirt mockup, Placeit's is the place to look.    Today we'll share 44 of the best plus size T-shirt mockups you can find there and show you how you can customise these stunning T-shirt mockups faster than you can say: WOW! That's cool! How to Make a Plus Size T-Shirt Mockup1. Go to Placeit.net > Mockups > T-Shirts > Plus Size   2. Select a Plus Size T-Shirt Mockup That Suits Your Needs   3. Upload Your Design   You can upload a logo here too if you have one. 4. Add an Accent Design   Then add your colour scheme.    5. Download Your Plus Size T-Shirt Mockup for a Small Fee   And that's how to make a plus size T-shirt mockup in five easy steps. Now let's take a look at the 44 best plus size T-shirt mockup templates you can find at Placeit. 44 Best Plus Size T-Shirt MockupsPlus Size T-Shirt Mockup Featuring a Woman Wearing a Bomber Jacket   When you need a stylish plus size T-shirt mockup, Placeit should be your first stop. It offers a number of gorgeous mockups like this one. Just upload your design using the T-shirt mockup generator, and this mockup is ready to download in seconds. Plus Size T-Shirt Mockup of a Happy Woman in Her Patio   Don't worry, be happy when you upload your latest designs to this plus size T-shirt mockup. It's such an infectious mockup that your audience can't help feel happy just looking at it. White Shirt Womens Plus Size Mockup Featuring a Woman at a Gym   If you create inspiring workout quotes and need a plus size T-shirt mockup to show them off, look no further! This shot of a model getting into shape using a lat pull-down machine is exactly what you need. Plus Size T-Shirt Mockup Featuring a Woman With Illustrated Doodles   This is one of the coolest templates in this awesome bunch. It features, of course, a plus size T-shirt mockup, but this mockup is made even more stunning with wonderful illustrated accents. White Shirt Women's Plus Size Mockup on New York City Rooftop   New York, New York! What could be more fabulous than a photoshoot in New York? And this one captures one of the locations New Yorkers love to take advantage of: the rooftop. Revel in that NY cool when you use this white shirt women's plus size mockup for your latest designs. Plus Size T-Shirt Mockup With Woman on Rooftop   What if you love the mockup above but were looking for an image with a landscape orientation? Not to worry. Placeit offers tons of variety on most mockups. For example, here is the same model on the same rooftop in an image with landscape orientation, and striking a slightly different pose. Crop Top Shirt Women's Plus Size Mockup of Woman   The basic T-shirt is such a wonderfully versatile fashion statement, and no more so than when it comes in cropped styles. Use the T-shirt mockup generator to upload your design, and your work is done. T-Shirt Mockup Size With a Woman in the Kitchen   2020 and 2021 have seen many of us confined to our homes, and what can be better than using a domestic setting to share your gorgeous designs or inspirational quotes? Use this white shirt women's plus size mockup for your next creation. Plus Size T-Shirt Mockup of a Woman in a Hallway   Show off your design with this terrific plus size T-shirt mockup featuring a model posing with a cool black leather jacket. Come on, vogue! T-Shirt Mockup Size Template of Man Posing in a Bar   Just because we've featured a whole lot of female plus size models, it doesn't mean Placeit doesn't have a good assortment of male plus size models too. If your demographic is male, this T-shirt mockup for plus size men is for you. Smiling Woman Wearing T-Shirt Mockup Size   Need a more dressy white shirt women's plus size mockup? How about this one featuring a model out on the town with her cool bomber jacket slung over her shoulder? Plus Size T-Shirt Mockup With a Woman in Front of a Hedge   Here's another option using the same model above. This time, she's wearing her jacket. That's one of the great things about plus size T-shirt mockups at Placeit. They offer tons of variations so that you have lots of options to choose from. T-Shirt Mockup Size Template of a Middle-Aged Woman Doing Yoga at Home   Looking for just the right plus sized T-shirt mockup to show off your yoga design? This fabulous mockup may be just what you're looking for. Experimenting on Placeit is absolutely free, so upload your design to see if this mockup is a fit. Mockup of a Woman Wearing a Plus Size T-Shirt With Her Bike   Bike clubs that want to broaden their demographic will love this plus size T-shirt mockup. Just upload your design using the handy "Insert Image" button, and use your mockup in your next advertising campaign. White Shirt Women's Plus Size Mockup Template With Two Friends   Here's a his and hers plus size T-shirt mockup that's perfect for his and hers designs or for when you want to showcase different versions of the same design. Plus Size T-Shirt Mockup of Woman Using Her Laptop   This awesome mockup of a young woman working at her computer is a terrific plus size T-shirt mockup for company logos. Upload your logo and download your template in a matter of seconds. Plus Size T-Shirt Mockup Featuring a Woman Sitting on a Rock   Simple, yet effective, this plus size T-shirt mockup is perfect for a wide range of designs or slogans. White Shirt Women's Plus Size Mockup Template   This is an excellent white shirt women's plus size mockup for showcasing the same or different designs on the front of the T-shirt and on the tote bag. A great mockup for company logos or creative designs. T-Shirt Mockup Size Template Hipster of Woman Wearing a Hat and Sunglasses   There's something terrific about this plus size T-shirt mockup, which combines the model and her shadow. Just use the "Insert Image" button to add your cool designs to this mockup. Plus Size T-Shirt Mockup Featuring a Cool Hispanic Guy   Placeit is all about options, so here's the male version of the plus size T-shirt mockup. This mockup doesn't reveal much of your design, but sometimes a peek is all you need. T-Shirt Mockup Size Template of an Elder Man Sitting in an Outside Space   Unlike the plus size T-shirt mockup above, this one does allow a great view of your design or logo, so don't hesitate to use the "Insert Image" button to see how your logo would look with this mockup. Plus T-Size Mockup Featuring a Smiling Group   The possibilities are endless when you have plus size T-shirt mockups like this one, which features three mockups in one frame. It can be used to showcase designs for family reunions, business logos, three different versions of a design, and more. White Shirt Women's Plus Size Mockup Template   How cool is this plus size T-shirt mockup template? Combining photo and illustration takes the creative possibilities of the template to a whole new level. This is one you can really have some fun with. T-Shirt Mockup Size Template of a Woman on Her Way to Work Out   Here's another great white shirt women's plus size mockup for a fitness club, gym, or walking group. Use the "Insert Image" button to upload your design and download the mockup in seconds. T-Shirt Mockup Size Template Surrounded by Cut Out Paper Shapes   Of course, we can't leave children out of the equation because there are many designers who create for kids and need plus size T-shirt mockups like this one. One of the great things about this template is that you can change the colour of the background to suit your needs. White Shirt Women's Plus Size Mockup   We've covered a lot of T-shirt mockup front views, but Placeit also offers plus size T-shirt mockups with back views. This one keeps your design front and centre of the template. Plus Size T-Shirt Mockup With Woman Posing in an Urban Stairway   Sometimes you just need a simple yet beautiful multipurpose T-shirt mockup that displays your design clearly. For those times, this wonderful plus size T-shirt mockup is the perfect template for you. T-Shirt Mockup Size Template of a Woman Against Grey Background   Looking for a white shirt women's plus size mockup with a neutral background? Well, here it is. There's nothing at all to distract your viewer's eye from your design because the model is sitting front and centre of the screen. Plus Size Tshirt Mockup of a Happy Woman   And true to form, Placeit offers a couple of variations on this plus size T-shirt mockup template, so take your pick. Plus Size T-Shirt Mockup of Man in a Studio   And just in case you're looking for the male plus size T-shirt mockup version of the one above, here's a mockup featuring a male model with a similar neutral grey background. Plus Size T-Shirt Mockup With Woman Through Window   Designers of logos for coffee shops and cafes will love this plus size T-shirt mockup with its red window which forms a great frame for the model. Plus Size T-Shirt Mockup Featuring Three Friends Having Drinks   Here's another take on the cafe logo idea. This time, it features three models instead of one. Of course, this could also work well for other design ideas. White Shirt Women's Plus Size Mockup   If you need an artsy plus size T-shirt mockup to complement your design, how about this template? It offers all sorts of wonderful illustrations combined with your mockup photo to create an eye-catching look. White Shirt Women's Plus Size Mockup Template   This everyday scene is perfect for showing off a wide range of designs. Customise this plus size T-shirt mockup in seconds, and download it for a small fee. White Shirt Women's Plus Size Mockup Template   This wonderful plus size T-shirt mockup would fit into so many scenarios. So whether you're looking for a mockup to showcase a school emblem, a business logo, a great quote, or a design, this logo is a great choice for you. T-Shirt Mockup Size Template of Woman Near Palm Trees   This Venice-Beach-inspired plus size T-shirt mockup is just perfect for showcasing designs that celebrate the summer with style. Plus Size T-Shirt Mockup Template   A novel approach to T-shirt mockups, this template of a man holding his plus sized T-shirt up to the camera is a great fun way to show off your designs. Shirt Mockup Size Template of a Woman Posing Outside a Restaurant   Simple and stylish, this is a great choice for summery designs and witty quips. Upload your design to see if this plus size T-shirt mockup is the right fit for you. T-Shirt Mockup Size Template With Elderly Man   Are older plus size T-shirt mockup models your target demographic? Then this may be the ideal mockup for you. Use the "Insert Image" button to test your design with this template and, if you like, hit the download button. Plus Size T-Shirt Mockup of a Woman Standing at a Corner   Keep your design front and centre when you use this simple but effective plus size T-shirt mockup. Remember, you can change the colour of the T-shirt to any colour you want if you're looking for something other than white. Shirt Women's Plus Size Mockup Template   And stretch 1-2-3! If you've created the perfect logo or design for exercise buffs or groups, you'll need an eye-catching logo to showcase it. This plus size T-shirt mockup is an excellent choice. Easy to use and easy to download. White Shirt Women's Plus Size Mockup Template   New York City's iconic subways have hosted many a photoshoot, for the simple reason that they're quite iconic and distinct. It stands to reason, then, that this would be a great choice of mockup for your designs. The great news is that with the click of a couple of buttons and a small fee, it can be yours. Plus Size T-Shirt Mockup With Tattooed Woman   This template is another of those irresistible photo and illustration combinations that will help your designs shine. There are several illustrations offered with the template, so check them all out and choose your favourite. Plus Size T-Shirt Mockup Featuring a Woman Outside Store   Street apparel companies might like this urban inspired plus size T-shirt mockup to show off their logos. Both simple and stylish, I'd say it's a great choice indeed. Choose Your Favourite T-Shirt Mockup TodayNow that you've seen the best plus size T-shirt mockups available at Placeit, head on over to the site and customise your favourite T-shirt mockup today. And if you're interested in other cool mockups, check out these roundups of the best resources available at Placeit:
 |
| Creative Arabic Calligraphy: Anatomy of the Letterforms Posted: 17 Jun 2021 08:00 AM PDT   The alphabet chart provided in the introduction was an overview; today we are looking at each letter in detail. You'll learn about each letter's proportions, its essential form(s), its relationship to the baseline, and the letters around it. I've also included snapshots of each letter, as found in historical documents spanning the period of Kufic supremacy, to show how much some letters can change within their essential identity. If you're familiar with the Arabic script as it's taught today, i.e derived from the round scripts, you may find some of the letters are quite different from what you know. Just as a reminder, I am distinguishing between letters, of which there are 28 in Arabic, and letterforms, of which there are only 18 because many letters share the same letterform with different arrangements of dots. You'll notice that I'm not setting down forms so much as principles, over which form can be interpreted with great freedom. It's very much like the structural part of a building, which is invisible from the outside but, if sound and well-proportioned, contributes more beauty than the cosmetic additions. This simile is all the more relevant when you know that the script we're working with is called handasi هندسي in Arabic, which means both "geometric" and "architectural". Basic ElementsTo begin with, let's define the parts of a letter. If we really boil it down, we can think of the Arabic script as made up of identifying shapes issuing from a baseline that runs like a thread through any text, only disappearing momentarily when letters don't connect. Some of these shapes are constant: they're the body of the letter. Another set of shapes is only present when it isn't connecting to a letter following it: they're the tail. The body shapes are as follows:   The most basic shape is a vertical stroke (in essence, not necessarily in form), a tooth that can be thought of as the Alif shortened (see below for more about the Alif). The notch is closely related, a diagonal stroke, though this deviation from the rectilinear grid led to great variations in notched letters. When a letter features a line above the baseline and parallel to it, the resulting effect is what I refer to as a box, but the first side (on the left) may be open, as is the case in the Kâf and Dâl. Finally, the loop or circle, which can in some cases be lifted off the baseline. The tails have various relationships to the baseline:   The flat tail is simply a horizontal line that's flat on the baseline, and of potentially indefinite length. Anything added to its extremity is cosmetic. The returning tail starts out on the baseline then folds in underneath itself; the return can then be stretched underneath the word as much as desired. In time, the returning tail started opening up to become a curve open towards the right. The bowl in contrast was always open (upwards), though its form was not always so full; it's essentially beneath the baseline. The 18 LetterformsIn the diagrams below, I examine the essential shape of each letterform and then provide samples of this letterform as found at different periods and in different mediums. This essential shape is like our invisible structural part, the nuts and bolts inside a construction, or like the stick figure used when drawing people: it isn't the outer shape of the letter, so don't copy it thinking that's the original letter. The period examples I provide are examples of outer shape, and they're there to give you a better feel for the letter. The reason Kufic is difficult to teach except by apprenticeship is that unlike cursive scripts, there isn't a definite single form for each letter, which I can show you and say "this is it, memorize it": we need to interiorize the subtle essence of each letter. This is why I'm showing a range of forms. In the same way, you might look at members of the same family and positively feel what makes them look alike, but be incapable of pinning it down on paper. Please note that I am not attempting to identify the styles and periods with scientific precision, firstly because the scarcity and confusion of resources makes it impossible to do so with any honesty, and secondly because that's quite irrelevant to your purpose, which is to become intimate with the letters. The concerns of a calligrapher are not the concerns of a historian. If I simplify, it's because it's more helpful to do so. And now let's examine the letterforms. I'm not following the graphic or numeric orders, but grouping similar shapes together. Alif اThe Alif, the primordial letter, is a single vertical stroke or, when constructed, a tall rectangle. It's non-connecting, so it only attaches to the letter before it. I show in grey how the letters connect, and the bolder line is the baseline, of which we must always be mindful; the Alif always stands on the baseline. The width of the Alif defines our measuring unit. As for height, in this chart, it's five units high, but this is merely the height I chose as a starting point for the illustrations in this lesson: the Alif sets the proportions for the whole alphabet, and the calligrapher sets the proportions of the Alif. How to do this skillfully will be our work in subsequent lessons. In all cases, however, only two letters are as tall as the Alif, and no letter is ever taller.   The historical examples below show us that the Alif is very often given a foot to the right. This may have started as a way of making it occupy more space; if you remember the early examples of Kufic we saw, they were characterized by much stretching and wide spaces. In such a composition, the Alif would have needed to be given more visual presence, and the "Kufic on vellum" examples here occupy no less than a square space. The foot then becomes more discreet as the Alif becomes leaner and taller, but it can be used for decorative purposes, as can the head with the addition of a "serif" (tarwîs) that can be quite elaborate.   Bâ' ب , Tâ' ت , Thâ' ثIn contrast to the Alif, which is the quintessential vertical, Bâ' is the quintessential horizontal. Its head is a simple tooth, but when isolated or final, it stands out with its long flat tail (at least as long as the Alif is tall, but can be stretched without limits, or compressed slightly at need). The height of the tooth is also a matter of decision, but in all cases it's no higher than notches, loops, or boxes. Bâ' always sits on the baseline. Although I speak of the Bâ', this letterform applies equally to the letters Tâ' and Thâ'. Bâ' has a single dot underneath it ب ; Tâ' has two dots above ت ; Thâ' has three dots above ث. Their exact placement is not strictly regulated, but depends on aesthetics: when the letter connects, they stay close to the tooth, but when the flat tail is present, they can take any position along the tail that pleases the eye.   The historical examples show little variation, but offer some examples of how to end the flat tail elegantly. Note the ornamental form, which adds a dip beneath the baseline between the tooth and tail—pretty much the most revolutionary thing you can do with this very primary letterform.   Nûn نWhen connecting, Nûn is a tooth, just like the previous letterform, but characterized by a single dot. But instead of a flat tail, this tooth is attached to a bowl—as a matter of fact, you could say the Nûn is the bowl. The two forms shown below reflect the deep transformation this letterform underwent: the earliest forms of the Nûn show that the bowl was an open angle, rather than the wide open round or square bowl that characterizes it today—although it always did, and still does, drop beneath the baseline.   It's important to be aware of these two forms because any letter that has a bowl will follow the shape of the Nûn, whether it's the earlier or later. Inversely, some letters such as Râ' will be sure not to follow the shape of the Nûn. Out of context, the early form, as well as some of the historical examples below, look very much, to modern eyes, like a Râ. But this confusion is clarified by seeing the two letters side by side in their proper context. When the Nûn is square, the Râ looks more like a triangle that sits on the baseline (see Râ' for more details); when the Nûn is oblique, with three sides clearly defined, the Râ only has two. This may be a good time to point out the relational aspect of our study of letterforms: we are attentive not to each form as if an absolute given in a void, but in relation to the other letterforms, so that if we modify one, we know how to modify others so that the alphabet as a whole works harmoniously.   Lâm لThis is one of only two letters that are as tall as the Alif, and it's basically an Alif attached to a Nûn (or a long tooth with a bowl). It therefore also has an earlier and a later form.   In itself, Lâm doesn't appear to be a very interesting letter, but it benefits from a close association with Alif as they're constantly paired together in the article al-. This means any text is punctuated by a recurring pair of verticals, and that visual element is a treasure. It can be used to create rhythm, and the two letters, being unmistakeable, lend themselves to every conceivable decorative or clever device, which does not have to be repeated consistently throughout a text but can be different in every instance. The two shown here are but modest examples.   Note that in the Eastern Kufic examples show here, the Lâm has retained the earlier bowl. We cannot know with certainty the reason for this choice, but my feeling is this: all the short teeth in this style are slanted, and this compensates for the opening of the Nûn so that the inner space remains somewhat contained, and the opposite sides are still parallel or nearly. But the long tooth of the Lâm couldn't be slanted, so an open bowl would be far too open and weaken the overall tightness of the text—hence retaining the earlier form for this letter. Yâ' يYâ' is an unusual letter in that its body, which is the upper half of a loop, seems less important than its tail, which has several possible shapes. It started out as a returning tail, but often that folded underneath itself again to create an S shape. Later the S started opening up in a parallel evolution to the bowl of the Nûn, so that in some styles it's identical to it. All three tails, however, can be used at any time without any ambiguity. This gives the Yâ' much creative potential: it's so recognizable that you can push it quite far. Note that when connecting, the body becomes a tooth, with two dots underneath.   Notice below the top Eastern Kufic example, where the body has been altogether omitted and the Yâ' is purely a returning tail.   Râ'ر , Zayn زRâ' is said to be "half a Nûn". This makes sense both in the early and later form: in the beginning, Râ' is essentially a very small angle sitting on the baseline, while Nûn, as we've seen above, is the same shape but its angle drops lower, below the baseline. In the early manuscripts this gives Râ' the appearance of being folded onto itself to form a triangle. In fact, it looks like a Dâl to modern eyes, but that letter, at the time, was boxed, and completely distinct. The Râ' opening up coincides with Nûn doing the same, so the letters never have the same appearance in the same text—but the design of the one is always based on that of the other.   Note in the ornamental forms below how the tail can rise back up over the letter, a good device to fill what could be an awkward empty space.   Sîn س , Shîn شThe Sîn is made up of elements we are already familiar with: three teeth, the last of which flows right into a bowl. It can even be said that it's made of two teeth plus a whole Nûn (the last example on stone, below, shows this strikingly). Sîn س is unpointed (no dots) while Shîn ش has three dots.   The three teeth of the Sîn can be confusing when close to other toothed letters, so it's wise to reduce the spacing between them in order to gather them into one unit (though this can be achieved by other means as well). Their repetition can also look monotonous, and to remedy that, many creative solutions have been used, the simplest of which is to vary their height. Typically the middle one would be the regular tooth height, with the first tooth slightly higher, the last slightly lower. In Eastern Kufic this was stylized into a pure triangle with spaces outlining the teeth. Other ornamental solutions have focused on the central tooth, making it higher to create symmetry.   Jîm ج , Ḥâ' ح , Khâ' خThis letterform is characterized by the forward diagonal notch, with a returning tail. Jîm ج has one dot below (or inside the tail, as by the time dots were in use, that had opened up), Ḥâ' ح has no dots, and Khâ' خ one dot above (or before the notch, depending on which is more suitable).   There are a few peculiar things about this letterform. First, the returning tail was sometimes substituted for a flat tail. This is mind-boggling to us now because the curve of the Jîm's tail seems so essential to the letter, but I found several historical examples showing that, early on, there was some indecision in that regard, very likely because no other letters use the forward notch, so there was no ambiguity possible. Second, the connection with the previous letter does not always take place on the baseline: we often see letters attaching to the notch itself. This creates a secondary baseline above the main one. Finally, the shape of the notch finds many interpretations. It can never be a vertical, which would be a tooth, but it can become a short open box, or a quarter of a circle (convex or concave), or any combination thereof. The notch can also jut out under the baseline (as in the Eastern Kufic examples), which is a good way of breaking the monotony of an excessively flat baseline.   Ayn ع , Ghayn غThis is quite an interesting and subtle letter, as we can infer from the diversity of forms it took across history. We know that the body of the connected Ayn is a pair of "antennae" which are none other than the two diagonal notches back to back, and I posit that its unconnected form is (in essence) the backward notch, the counterpoint of the Jîm's forward notch. Only its writing, with a reed, inevitably leads to a curved shorthand, and the curve became the norm. In the same way, the "antennae" ended up connecting because it was faster to write the whole thing in a single stroke, and that closed shape became the norm, without fully eliminating the older one. Ayn has a returning tail that matches Jîm's, and shares its letterform with Ghayn غ , which has a dot above.   The diversity of shapes seen below for the connected Ayn underlines one important point: the Ayn is distinct from a loop form and is not derived from it. Its original relationship to the baseline, which is a single point from which the two "antennae" emerge, must always be kept in mind. It's also a symmetrical letter, the two halves mirroring each other. To use an image that will help us later: its invisible backbone is in the centre, so any decorative peak, hollow, or addition, is also centered.   Mîm مThe Mîm is the loop par excellence. It's a pure circle, which often did not even have a tail, and early on only sported a very short one. It's the only letter that can be centered on the baseline (interrupting it), although it can also sit on it. It's never, however, lifted from it. We can say that in contrast to Ayn, Mîm always has two points of contact with the baseline. Like the Ayn, however, its backbone is centered, and all that may go with it.   The historical examples show great indecision regarding the tail of the Mîm: short or long, horizontal or vertical. It doesn't seem to matter, because in this case it's more a decorative element than an essential part of the letter. What does matter is not to give the Mîm a tail that belongs to another letter. A flat tail, for instance, would make it a Fâ, and a bowl would make it a Qâf. This is why you see below various "freeform" tails, and none of the established ones we examined above. You can see the centered nature of it, although it's always harder to spot in the slanted Eastern Kufic (and there is an exception on stone).   Fâ' فFâ' is a loop on a tooth, with a flat tail (which is styled after the Bâ's tail). Though it can be equally lifted off the baseline or sitting on it, you can feel the presence of the tooth, and what this means is that Fâ's "backbone" is both visible and off-centre, to the right of the letter.   The result is that Fâ' can be quite flat on one side, and take on the shape of a quarter-circle rather than a full circle. If an ornamental peak or other shape were added, it wouldn't be in the centre of the loop, but on top. The North African variation below, which has a round Fâ' on a central stem, is from the same manuscript as the similar Ayn shown above; there is a conscious design decision there to exaggerate the roundness of the Ayn and use looped letters with a strong stylistic coherence. A fine example of bending the rules without breaking the result.   Qâf قThe body of Qâf is identical to Fâ' in every way, except that it has two dots instead of one. The distinguishing factor between the two is the tail, which often is mistakenly assumed to be the same. In fact the Qâf's later form has a bowl, which curves under the baseline in complete contrast to the Fâ's flat tail. Its earlier form was even more distinct, and somewhat similar to Yâ's doubly-returning tail.   The historical examples show the evolution of this tail, which takes on the shape of a sickle or an S in some manuscripts, but gradually opens up. Only a brief stop before the open curve remains, and that's eroded in time too. Note the stone example with the straight, angular tail, so reminiscent of the early Nûn.   Wâw وWâw is simply a Râ' with a loop. In the earlier form, this means it sits on the baseline, with the loop so close that the overall silhouette is a rounded triangle, when it's not pushed altogether into a circle. In the later form, the loop-on-tooth is more evident, which implies that like Fâ', Wâw has a visible backbone on the right—but unlike it, Wâw's loop is always on the baseline, not raised.   Like Râ', the Wâw's tail can curl back over its head to lend itself to all sorts of decorative devices.   Hâ' هThe last of the looped letters is unique in that, when it connects, it's essentially two loops around a tooth. Being so distinct, it matters not at all whether these two loops, which usually become two openings in a unified shape, are arranged vertically or horizontally or even diagonally, in a rounded, square or triangular shape, and whether the tooth is still visible, juts out or not. At least one example below even has one loop above and one below the baseline. When not connecting, it's like a Fâ' without a tail, but with the tooth often extending above the height of the loop. In fact this is often a prominent feature of this letter in this position.   Some of the examples below show how the loop of the final Hâ' can be raised off the baseline, but note that this can only happen when it's connected to the previous letter. An isolated Hâ' cannot stand on a disembodied tooth, but must sit on the baseline.   Dâl د , Dhâl ذIn Kufic, Dâl is the smallest of the boxed letters, but it's still much larger than we are used to seeing it in the round styles. It can extend horizontally to a great degree, but as it's nearly identical to the Kâf, it's wise to keep it shorter, perhaps no longer than an Alif's height, since the Kâf is no shorter than the same measure. Dâl has a hook that's usually diagonal but can be interpreted vertically or in a number of creative ways. Dhâl ذ is differentiated by a dot over the hook or body.   Unlike Râ', Dâl never opens up in Kufic, though it does become frankly triangular in Eastern Kufic, which has that effect on many letters. In some ornamental forms the hook becomes so large that the letter is indistinguishable from a Kâf, except for the fact that it doesn't connect.   Kâf كEarly on, the only difference between Kâf and Dâl was the fact that Kâf connects. It then underwent more development than Dâl, particularly in the hook, which took on much more importance (in the rounded scripts, the hook of the Dâl would disappear completely, while that of the Kâf would become its most salient feature). We also find that in non-connecting Kâfs, the lower line extends more, elegantly balancing the height of the hook, and is treated, design-wise, like a short, flat tail. Note that the relatively new form of the Kâf, where it looks like a Lâm ل with a hamza ء, is unknown in Kufic.   The examples below show how much variety was possible in the hook, and the contrast between the very short early Kufic ones and what came afterwards—one of the Eastern Kufic examples looks for all the world like a kite at the end of a thin string, in contrast to the lines of the body which look all the more substantial and grounded for how close they're together. There is even an oddity: a fantasy Kâf with a triple body, in the ornamental section, without any loss of identity.   Sâd ص , Ḍâd ضSâd is a closed box with a bowl and a tooth, though the latter doesn't necessarily follow the height and design of the other toothed letters in a script. In fact this appendix lost importance with time (in rounded scripts it's always present, but diminutive) and is sometimes altogether omitted. It's never, at any rate, as prominent as that of Ṭâ', our next letter. Ḍâd ض is differentiated by its dot.   Note the unusual ornamental form with two teeth, for the purpose of symmetry.   Ṭâ' ط , Ẓâ' ظṬâ' is a box with an Alif or long tooth attached, and the one letter other than Lâm to be as tall. It originally had no tail at all, and only ever acquired a short, token one, much like Mîm's. Its twin, Ẓâ' ظ, is recognized by the one dot, which is always before the long tooth, over the body.   The long tooth does not have to be vertical, and is often slanted back at the same angle as the hook in Dâl and Kâf. This makes this letter sometimes look exactly like a Kâf, with a close examination revealing that it's in fact a closed box, unlike Kâf. There are even examples of the long tooth standing on the back of the box, rather than coinciding with its left side.   Lâm-Alif لاIt's not possible to study the letters without looking at the "29th letter", which is the well-known ligature Lâm-Alif. When Alif follows Lâm, they obligatorily form a new glyph that's essentially an X joined at the baseline. The triangle which is formed is made to match the height of the looped letters, and the arms are as tall as the Alif.   With that basis in mind, no letter has been the focus of so much invention. There are hardly any rules, except the fact that it sits on the baseline and doesn't connect. Symmetry is almost always a feature of these creations, but at least one example below shows that it's by no means a requirement.   ExerciseThis is a lot of material to take in, and you shouldn't expect to memorize it all at once. Keep it as a reference to return to, and gradually it'll just seep in, particularly as we work with the letters in upcoming exercises. Your exercise in preparation for the next lesson is simply to look closely at old Kufic manuscripts and inscriptions (there are plenty available online, but focus on historical ones) and to use this guide to identify the letters. Sketch as many of your findings as possible, an essential practice to help you register the letterforms and prepare to create them. Top Arabic Calligraphy Fonts From Envato ElementsCreating your own Arabic calligraphy styles from scratch is a rewarding process. However, it does require a lot of time and attention. If you're working on a project that needs some punching up in its text, you can download a font with Arabic calligraphy style from Envato Elements. Here are five top choices for you to try: 1. Mustopha: Arabic-Style Font (OTF, TTF)   Let's start our list of Arabic calligraphy fonts with Mustopha. It's a must-have that comes with unique lettering and decorative elements. This Arabic style font takes inspiration from 'Hijaiyah', the letters that arrange the words of the Quran. 2. Tcho (OTF)   Tcho is a truly multilingual Arabic calligraphy English font. It has support for many tongues from around the world. That means whether you're writing in Slovakian, Turkish, or Russian, you can use the bold and attractive letters. It makes for an excellent download of a font if you like your Arabic calligraphy to shine. 3. Sabana: Arabic Font (OTF, TTF, WOFF)   The beautiful Sabana Arabic-style font is an elegant eye-catcher. Each glyph pays tribute to traditional Arabic art and lettering. Want to try it for invitations, social media posts, or Ramadan greeting cards? Just download this font with Arabic calligraphy influence. 4. Rakhisa: Cartoon Faux Arabic Font (OTF, TTF, WOFF)   Rakhisa is a unique Arabic style font. It adds a cartoonish touch to Arabic letters. The attention to detail makes the results look very fun and worth adding to your work. Rakhisa also includes a web font, so you can use this Arabic calligraphy English font online. 5. Assyam: Arabic Themed Typeface (OTF, TTF, WOFF)   Our list of Arabic calligraphy styles comes to a close with Assyam. It works on Mac and PC devices and is really easy to install. This Arabic style font also has multilingual support, so you can share this look in many different languages. ConclusionLearning about what pieces make up the anatomy of Arabic letterforms is important to know if you want to master this skill. As with everything, continued practice makes perfect, so feel free to refer back to this tutorial when you need it. If you're working on a project that needs some Arabic calligraphy fonts for text, you can find a professionally designed download from Envato Elements. Are you looking to keep working with this tutorial series? You'll find links for the other guides below:
 |
| How to Use LUTs to Colour Grade Pictures in Affinity Photo Posted: 17 Jun 2021 07:56 AM PDT More photographers are turning to Affinity Photo for their image editing. Did you know that you can use LUTs in Affinity too? LUTS – Look Up Tables – are a great way to change the look of images and video without directly affecting your original. You can make changes at any point after adding your LUT as it won't have touched your editing sliders, which is a lot more flexible than a simple Affinity photo preset or Affinity photo filter, for example. In this tutorial, we'll show you how to load LUTs into Affinity Photo and how to apply them to colour grade your photographs. First though, if you need a set of LUTS to try, you can find plenty over on Envato Elements, where everything's included in a monthly subscription. In this tutorial I'm using this newly added set: 50 Paradise LUTs Pack    How to Use LUTs to Colour Grade Pictures in Affinity PhotoMake Your Basic CorrectionsMake all the basic corrections to your raw image as you usually would, things like applying profile corrections, adjusting highlights and shadows... generally bringing your photograph up to a technically acceptable standard, ready to colour grade.    When you've done that, click develop which will essentially convert your RAW data into a pixel-based raster image. How to Load LUTs into Affinity PhotoNow we'll load up a LUT.    Click on the Adjustment panel and near the bottom you'll see LUT. Click on it for a drop down menu. To the right of LUT there's a cog icon for further options. Click and choose Import.    If your download is in a zip file, unlike with Adobe Camera Raw where you can upload the zip, you'll need to unzip the file first. You can then batch select – by highlighting – all 50 LUTs and import them.    You'll see the LUTs appear in your Adjustment panel as a list. You can then click down each one to see its effect.    Applying Your Affinity Photo LUTSWhen you click on a LUT, a box appears with some further options. As well as the usual Opacity to reduce the effect, and Blend Mode which lets you choose from a number of options like darken, multiply, overlay etc, there are some extra things too. Here's what they mean: Next to Load LUT you'll see the one you've already selected from the Adjustment list. If you want to, you can load an individual LUT into here instead of going through the Adjustment panel. Merge is to merge your LUT effect down onto the layers below as part of the photo. Delete will remove the LUT and close the panel, and Reset will remove the LUT's effect without closing the panel. Infer LUT. Affinity explain this much better than I could, so here's how they describe it:
This is a really clever tool. Essentially, what it means is that you can emulate the look a filter or edit, as long as you have the original. For example, if I uploaded an image to Instagram, applied a filter and wanted to replicate that look on my own, I could put both the original image and the filtered image into Affinity and it would replicate that filter's colours and tones, with the option to export as a LUT that you can use across other images. The only caveat here is the image dimensions and colour space need to be the same for the Infer LUT tool to work. Adjustments After Applying Your LUTAfter you've applied your LUT you can make more edits in the Adjustments panel.    Above shows shadows and highlights as an example. You can see that the options give you a small preview of how your image would look if that option was applied, but then if you do click on it, you'll get the sliders shown in the image, so that you can fine tune them.    Each Adjustment you make will appear in the Layers panel, as has your LUT adjustment. So you can go to that panel any time to edit, remove the layer or flip it off and on to see its effect. Before and AfterHere's our sample image before and after grading with a LUT:    LUTs make image editing so versatile, and make a real difference when using them in Affinity for your photography. Unlike presets, LUTs in Affinity Photo will make changes based on colour values, rather than directly editing your photograph, so you can apply a LUT at any stage of your editing and still tweak your images without affecting the changes the LUT has made. You can also remove or re-apply them at any stage without adjusting your core edits. LUTs are available both to colour correct and to colour grade, so it's worth adding them to your workflow and playing around to see what you can create. More Great Photo Resources |
| How to Make Your Own Google Slides Presentation Template in 2020 Posted: 17 Jun 2021 06:55 AM PDT    There's no need for all your Google Slides presentations to look different. Save time and achieve a consistent look with a Google Slides presentation template. One way to do this is to design and create your own Google Slides presentation template. In this tutorial, we examine why you might want to create a presentation template. We'll also explain what a master slide and a master layout is. We'll show you how to create your own Google Slides presentation template. Finally, we'll show you how to customize a predesigned template to save time. Why Create a Google Slides Presentation Template?Your Google Slides template controls the impression your presentation leaves in the minds of your viewers. There are any professional presentation templates. But sometimes you need something a little more unique. When you want to use a unique presentation theme, create your own reusable Google Slides template for presentations.    Be careful, though. Any theme you create needs to be professional. The success of your presentation could depend on it. Consider consulting your in-house design team if you've got one. Use a Professional Google Slides Presentation Template from Envato ElementsHave you ever wanted to create a professional presentation, but didn't want to break the bank to do so? With the help of Envato Elements, that's possible. It's an all-you-can-download site that includes templates with top Google Slides master designs. On Envato Elements, you'll find dozens of professional designs. Download a template, add your specifics, and presto! You're ready to go.    Aside from great Google Slides template master designs, you'll get access to plenty of other assets. That includes extras like stock photos, illustrations, and more. After you start working with Elements, you'll see it's easy to learn how to add a template to Google Slides. Download a file from a library, upload it, and make Google Slides templates your starting point.    Remember: make Google Slides templates your starting point for your next design. With the help of Elements, you hit the perfect sweet spot of cost and quality with no surprise costs. Table of ContentsLooking for specific information about Google Slides templates? Find what you need in the table of contents below:
Guide to Making Great Presentations (Free eBook)Learn how create and give effective presentations. Before you dig deeper into creating your own Google Slides template, don't miss our free eBook on presentations: The Complete Guide to Making Great Presentations.    Now, let's take a closer look at how to create a presentation template. We'll start by creating a master slide and master layouts. Then, you'll apply them to a sample presentation to create your Google Slide template. What's a Master Slide and What Are Master Layouts?When creating a presentation template, you need to know what is a master slide in Google Slides. Simply put, the elements that you place on the master slide appear on every slide in your presentation. In contrast, a master layout defines the layout only for the slides it's applied to. To create a master layout, you'll use a combination of placeholders and graphic elements on each master layout. A master layout can be used for one or more slides in your presentation, or it may not be used at all. Access the Master Slide tool by selecting Slide>Edit Master from the main Google Slides menu. The master slide and master layouts appear: .jpg) .jpg) .jpg) A change made to the master slide appears on all the slides in the presentation. This includes the master layouts. For example, I've added a vertical bar to the left of the master slide. As you can see, the bar is automatically added to all the master layouts: .jpg) .jpg) .jpg) Pro Tip: Design elements added to the master slide appear on every slide in your presentation. But you can cover a master slide element on an individual slide by drawing a shape over it in a color that matches the background of the slide. How to Plan Your Own Google Slides TemplateBefore you create a Google Slides template, first plan for it. Some questions to ask yourself include:
To answer these questions, you need to consider the following: Step 1. Keep Your Audience in MindThis step addressed the question: "Who'll see the presentations created with this template?" The audience makes a difference in what you put in your Google Slides template. Obviously, a presentation template used by a teacher should be different than one used by a marketing department. Also, consider whether the presentation will be given by a live presenter or accessed online through a site like SlideShare by members of the target audience. If the latter is true, the first few slides are crucial to capturing the reader's attention. They need to be eye-catching, or your presentation will be ignored. Once you've thought about your audience, it's time to move on to planning the actual design. Step 2. Consider Design ElementsYour Google Slides template is made of many components, including:
The final template planning step is to plan the design itself. Step 3. Plan Your Template DesignIn this step, you plan what types of slides you'll include in your template. The types you decide upon become the master layouts of your template. Many professional designers create wireframes. These are sketches for each type of slide they would like to include in the Google Slides template. Wireframing can be quite useful. It provides a rough visual of what your presentation is going to look like. If you're not comfortable with wireframes, create a list of the slide types you wish to include. For example:
Since you'll likely use the same type of slide layout more than once in a presentation, you don't need to create a lot of master layouts. Figure out the basic layouts you need and focus on those. For another discussion of the presentation design process (this time using Keynote), refer to: After the planning is done, you're ready to create your Google Slides template. How to Create Your Own Google Slides TemplateStart by opening Google Drive. To open Google Slides, type https://drive.google.com in the Address field of your browser. Google Drive opens. Step 1. Create a New Google Slides PresentationOnce Google Drive is open, create a new Google Slides presentation. Click the New button in the upper left. Click Google Slides from the drop-down menu. A blank presentation appears: .jpg) .jpg) .jpg) The presentation is assigned one of the Google Slides default themes, but don't worry. We'll soon change that. Rename your presentation by typing a new title in the upper left. Step 2. Create a Master SlideWe've already examined the master slide tool. It's time to go back to it so we can define those elements that'll appear on every slide. 1. Select Slide > Edit master from the main menu: We've already defined a vertical bar for the left of the Google Slides Presentation. It's time to define the elements of the slide, starting with the font. Change the Font1. Click in the text placeholder on the master slide and select it. You'll notice the current font is Arial: .jpg) .jpg) .jpg) Pro Tip: You'll find unique fonts and other graphic elements in Envato Elements. 2. To change the font for each text place holder, click the down arrow to the right of the font name (Arial). For this presentation, we'll use the common font, Georgia. .jpg) .jpg) .jpg) Pro Tip: You could also change the font size and other font attributes by clicking the arrow to the right of the word More next to the font name. 3. Continue selecting the text in each placeholder on the master slide to change the font at each level. When you're done, the font Georgia will be used throughout the entire presentation. But you could manually change the font for an individual slide. Add a GraphicYou can also add a graphic element to your Google Slide template. This element appears on every slide, so it's best to be subtle. In this case, I'll add a logo. Here's how to do it: 1. Select the master slide: .jpg) .jpg) .jpg) 2. Click the Insert Image icon from the tool bar beneath the main menu. The Insert Image dialog box appears: .jpg) .jpg) .jpg) 3. Drag an image from your desktop onto the dialog box. Or click the Choose an image to upload button to download an image from your computer. In this case, I downloaded a logo for my company: .jpg) .jpg) .jpg) 4. Drag the image where you want it to appear on your slides. In this case, I want the image to appear in the lower right corner: .jpg) .jpg) .jpg) We've just added a vertical blue bar, changed the font, and added a logo to the master slide. These changes will be reflected on all the slides in the presentation. Note: There's a page number beneath the logo on the master slide. We want this to appear on all the slides in the presentation except the title slide, so it's important to leave it here. Step 3. Add Master LayoutsYou're now ready to start adding your own master layouts from within the master slide tool (Slide > Edit Master). You're now ready to start adding your own master layouts from within the master slide tool. Click on Slide > Edit Master. Remove Extra Layouts To start, delete any current master layouts that you don't need. 1. To delete a master layout click on it to select it and right-click. 2. Choose the Delete option from the popup menu: .jpg) .jpg) .jpg) Note: You must leave at least one master layout in your template. Change a Master LayoutAfter you remove unwanted master layouts, you're ready to change any layouts you left in the template to match your own layout design. In this example, I'm going to change the master layout for the title slide to make the text left-aligned. Let's get started: 1. Click on the title slide master layout to select it: .jpg) .jpg) .jpg) 2. To change the text alignment, select the text to be changed. 3. Click the down arrow next to the More button in the Tools menu. Then, click the Left Alignment button. Here's what the title master layout slide looks like with the text left aligned: .jpg) .jpg) .jpg) Each time you apply the title slide layout to a slide in your Google Slides presentation, it'll look like your master layout. Change Another Master LayoutI've modified one more master layout as an example. Here's what I did: 1. To change another master layout slide, select the slide you want to change. 2. Use the editing tools to delete any elements you don't want to keep. (Remember, you can't delete elements from the master slide.) After removing the existing elements, you'll see a blank master layout like this: .jpg) .jpg) .jpg) For the master layout, I want to leave room for an image on the left and insert a text placeholder on the right. Note: There's currently no way to insert an image placeholder in a master layout. 3. Leave space on the left of the slide for the image. We'll draw a placeholder there that can easily be removed so that the user of the template knows what to do. 4. To draw the placeholder, click the arrow to the right of the Text Tool from the Tools menu. Select the Body text placeholder option from the drop-down menu. Now the master layout looks like this: .jpg) .jpg) .jpg) Caution: If you use the Text Tool without choosing the placeholder option, the text becomes an unchangeable part of the slide layout. 5. Use your cursor to draw the text box placeholder on the master layout. 6. Add a subtitle placeholder with the Subtitle placeholder option from the drop-down menu: .jpg) .jpg) .jpg) Continue modifying existing layouts. Or, you can add a new master layout slide through the Master Slide tool. Add a New Master LayoutHere's how to add a new master layout to your Google Slides template: 1. Click on any master layout to select it. 2. Right-click to bring up the drop-down menu: .jpg) .jpg) .jpg) 3. Select the New Layout option from the drop-down menu. A new master layout slide appears below the current master layout slide. 4. Change the new master layout as needed using the previous steps. Apply the Masters to Your Google Slides TemplateOnce you've created all the master layouts you need, return to the slide authoring view. Your template will be a sample presentation you build using the master slide and master layouts you just created. It can be modified when you need it. To start, all I've got in my Google Slides template is the title slide: .jpg) .jpg) .jpg) 1. To add another slide to your template, click the down arrow next to the New slide button in the upper left (it looks like a + symbol). A pop-up appears showing the available master layouts: .jpg) .jpg) .jpg) 3. Since you can't insert an image placeholder in a Google Slides master layout, insert a text box in your template. Include instructions on how the space is to be used: .jpg) .jpg) .jpg) For step-by-step instructions on how to add an image to a Google Slides presentation, study: 4. Continue adding slides and applying master layouts and sample text until your Google Slides template is done. Step 4. Use the New Google Slides TemplateOnce you've completed your template, you're ready to use it. Do this by modifying the template example to create an actual presentation. 1. Make a copy of the template using the File > Make a copy option on the main menu. .jpg) .jpg) .jpg) 2. Rename the copy so you don't overwrite over your template. 3. Right-click on any sample slides you want to use more than once and click Copy to duplicate it. Delete any template slides you don't need to use. .jpg) .jpg) .jpg) 4. Move the slides into the order you want them to be in your presentation by clicking on each slide and dragging it into position. 5. Type your information into the presentation. Add any images that you need for the presentation. For more information on how to create a Google Slides presentation, review these tutorials:
How to Quickly Customize a Google Slides Presentation TemplateYou've already learned how to create a template for Google Slides. Now it's time to customize a pre-designed template to help build amazing slide decks. Let's learn how in just five easy steps. If you'd like to follow along, download the beautiful Creative Google Slide Template from Envato Elements.    Let's get started: 1. Add Custom TextIt's easy to make Google Slides template designs work for you. The first step is to add custom text. Begin by highlighting any text you see on a slide. Then, simply start typing in your own words. If you'd rather leave a space blank, press Delete to remove any selected text.    2. Change the FontGoogle Slides templates like this often include custom fonts, but you don't have to use them. With a block of text selected, find the Font section in the center of the menu bar.    Change the font style or size by clicking the appropriate drop-downs. Plus, add effects like bold, italics, and more. 3. Import an ImageA Google Slides master designer knows that images are critical to the success of any slide deck. Pre-built templates make adding them a breeze. Image placeholders allow for instant image imports scaled to fit slides perfectly.    Click inside the placeholder, then choose Replace Image on the menu above. Click Upload From Computer. Browse to an image file and click to import it. 4. Change Shape ColorsThe human eye is naturally drawn to contrasting colors. As a presenter, take advantage of that fact to call attention to certain slide elements.    To change an object color, click to select it. Just left of center on the menu bar, click on the Fill Color icon. Browse a wide array of solid or gradient colors or create your own in the Customize section. When you see one you like, click once to apply it. Repeat as necessary. 5. Change the Master SlideLet's say you want to place an object on every slide in the deck. Adding it manually is time-consuming, and also unnecessary. That's where the Google Slides master comes in. On the Slide menu, click Edit Master. Under Office Theme, scroll up and select the Master Slide thumbnail. Any edits you make to this slide will automatically apply to the entire presentation.    Once you've made an edit, click X in the upper right corner to return to the normal view. 5 Google Slides Presentation Template Design Trends for 2021So, you've made your Google Slides template selection and you're ready to build a slide deck. It's a great start, but to succeed in 2021, you need more. That means embracing the latest template design trends. Let's explore five of the best: 1. Audiences Demand InfographicsPlanning to talk your way through detailed concepts? Think again. Audiences in 2021 demand visual infographics that vividly illustrate data and ideas. Pre-built Google Slides templates from Envato Elements come with creative infographics. They're easy to customize. They truly help bring your slide deck to life.    2. Smoother Presentations With Timed SlidesNothing distracts an audience faster than fumbling around with clickers. Or worse still, constantly asking an assistant to jump to the next side. With Google Slides, you can actually pre-time slides, making them advance automatically. It's a quick and easy way to keep your slide deck flowing seamlessly. Ready to learn how (in just 60 seconds?) Check out our full slide timing tutorial: 3. With Layouts, Less Is MoreBusy slides packed full of data won't impress modern audiences. It's key to stay focused, with an eye on a single big idea and a few supporting points. Use plenty of open space to ensure readability and an attractive slide layout. Minimalism is a great design concept to consider for your Google Slides template.    4. Classic Fonts Are OutArial, Times New Roman, Calibri: you see them everywhere. But the universe of fonts is so much broader. For 2021 slide decks, you should always consider new custom fonts. They bring new levels of style, sure to help you stand out from the crowd. Luckily, you can add your own custom fonts to Google Slides with just a few clicks. Check out our quick tutorial on Google Slides fonts here: 5. Use Plenty of PhotosAs the adage says, pictures are worth a thousand words. That's never been more true. 2021 presentations should include plenty of images. Photos help you introduce your team, show off your products, and explain your ideas. Plus, they help break the tedium and ensure your audience stays excited and engaged. 5 Top Google Slides Templates From Envato Elements for 2021Here are the top five Google Slides presentation templates that you can download from Envato Elements: 1. Palox Creative Google Slides Template   The Palox template has a creative and colorful design. It features a trendy gradient, but you can easily customize it to match your brand colors. The template comes with slides designed in 16:9 format and includes master slides. Use it as a basis to make Google Slides templates for your business. 2. Oriola Business Google Slides Template   If you're looking for a more traditional yet still modern design, the Oriola template is a great choice. It comes with 50 editable slides, master slides, and image placeholders. The template was designed in widescreen resolution. 3. Vigo Google Slides Template   The Vigo template has a minimal design that makes it a great choice for any type of presentation. It's also easy to customize to match your brand. The template comes with 110 unique slides and more than 500 custom vector icons. You'll also find master slides and image placeholders for easy editing. 4. Forward Multipurpose Google Slides Template   The Forward template is a multipurpose Google Slides template that can be used for any type of business presentation. This template uses trendy, bold colors, but you can easily change them to your liking. You'll get master slides as well as 86 unique slides and 10 color schemes to choose from. Make Google Slides templates based on Forward that'll really stand out. 5. Smarta Creative Google Slides Template   The Smarta template is a great choice if you've got to make an educational presentation. It's got tons of infographic elements, charts, and graphs. The template comes with master slides and image placeholders. It was designed in widescreen resolution. Templates for Google SlidesWe've just shown you how to create your own Google Slides template. But you'll save a lot of time with a professionally designed presentation template. You can find professional presentation templates at Envato Elements and GraphicRiver. Here's an article that gives you a peek at some of the professional templates and themes you'll find: After you've chosen a Google Slides template, learn how to use a professional theme: Common Google Slides Questions Answered (FAQ)If you're using Google Slides for your presentation, you probably have some questions. Here, we've gathered the most common questions and answers about Google Slides: 1. Is Google Slides Better Than PowerPoint?Google Slides is a great solution for creating presentations, especially if you want to collaborate with others. But that doesn't necessarily mean it's better than PowerPoint. The answer to this question depends on what software you're more familiar with. We've got a detailed comparison between Google Slides and Microsoft PowerPoint so you can decide which one's a better choice for you: 2. Can I Convert PowerPoint to Google Slides?Yes, you can. In fact, it's easy to convert a PowerPoint file to Google Slides format during the import process. To learn more about it, read our step-by-step tutorial. 3. Can I Add Video to Google Slides?Adding a video to your presentation can make it more dynamic and interactive. We've got a full tutorial that shows you how to easily add videos to Google Slides presentations. 4. Can I Save the Google Slides Presentation as a PDF?Saving your presentation as PDF allows you to distribute the slides as handouts during or after the presentation. You can easily export your Google Slides presentation as PDF by clicking on File > Download as > PDF. 5. Is Google Slides Free?Yes, like most tools offered by Google, Google Slides can be used for free. Learn More About Google SlidesGoogle Slides seems simple at first but there's more to it under the hood. Luckily, we've got plenty of tutorials to help you learn more about working with Google Slides. Get started with these tutorials:
Download Our eBook on Making Great PresentationsWe've got the perfect complement to this tutorial. It'll walk you through the complete presentation process. Learn how to write your presentation, design it like a pro, and prepare it to present powerfully. Download our eBook: The Complete Guide to Making Great Presentations. It's available for FREE with a subscription to the Tuts+ Business Newsletter.    Build or Customize Your Google Slides Template NowYou've just learned how to create a Google Slides template using master slides and master layouts. With a template, make sure that all the presentations your organization creates meet branding standards and look consistent. The easiest way to control how your presentation looks is to use a pre-designed Google Slides custom template with a Google Slides master. But if you've got the skill and the time, you can also make a Google Slides template. For even more information on how to use Google Slides, review our Google Slides learning guide How to Use Google Slides (Ultimate Tutorial Guide). Editorial Note: This tutorial was originally published in November of 2017. It's been comprehensively revised to include new information—with special help from Andrew Childress and Brenda Barron.  |


.jpg)
.jpg)
.jpg)
.jpg)
.jpg)
.jpg)
.jpg)
.jpg)
.jpg)
.jpg)


.jpg)
.jpg)
.jpg)
.jpg)


.jpg)
.jpg)


.jpg)
.jpg)
.jpg)
.jpg)


.jpeg)
.jpeg)


.jpg)
.jpg)
.jpg)
.jpg)
| You are subscribed to email updates from Envato Tuts+ Tutorials. To stop receiving these emails, you may unsubscribe now. | Email delivery powered by Google |
| Google, 1600 Amphitheatre Parkway, Mountain View, CA 94043, United States | |


0 Comments